Tuesday, May 23, 2023

Timber Quilt : Yuletide Forest


A Bit of Scrap Stuff Blog #ABitofScrapStuff #timberQuilt #Rileyblakedesigns #quilt

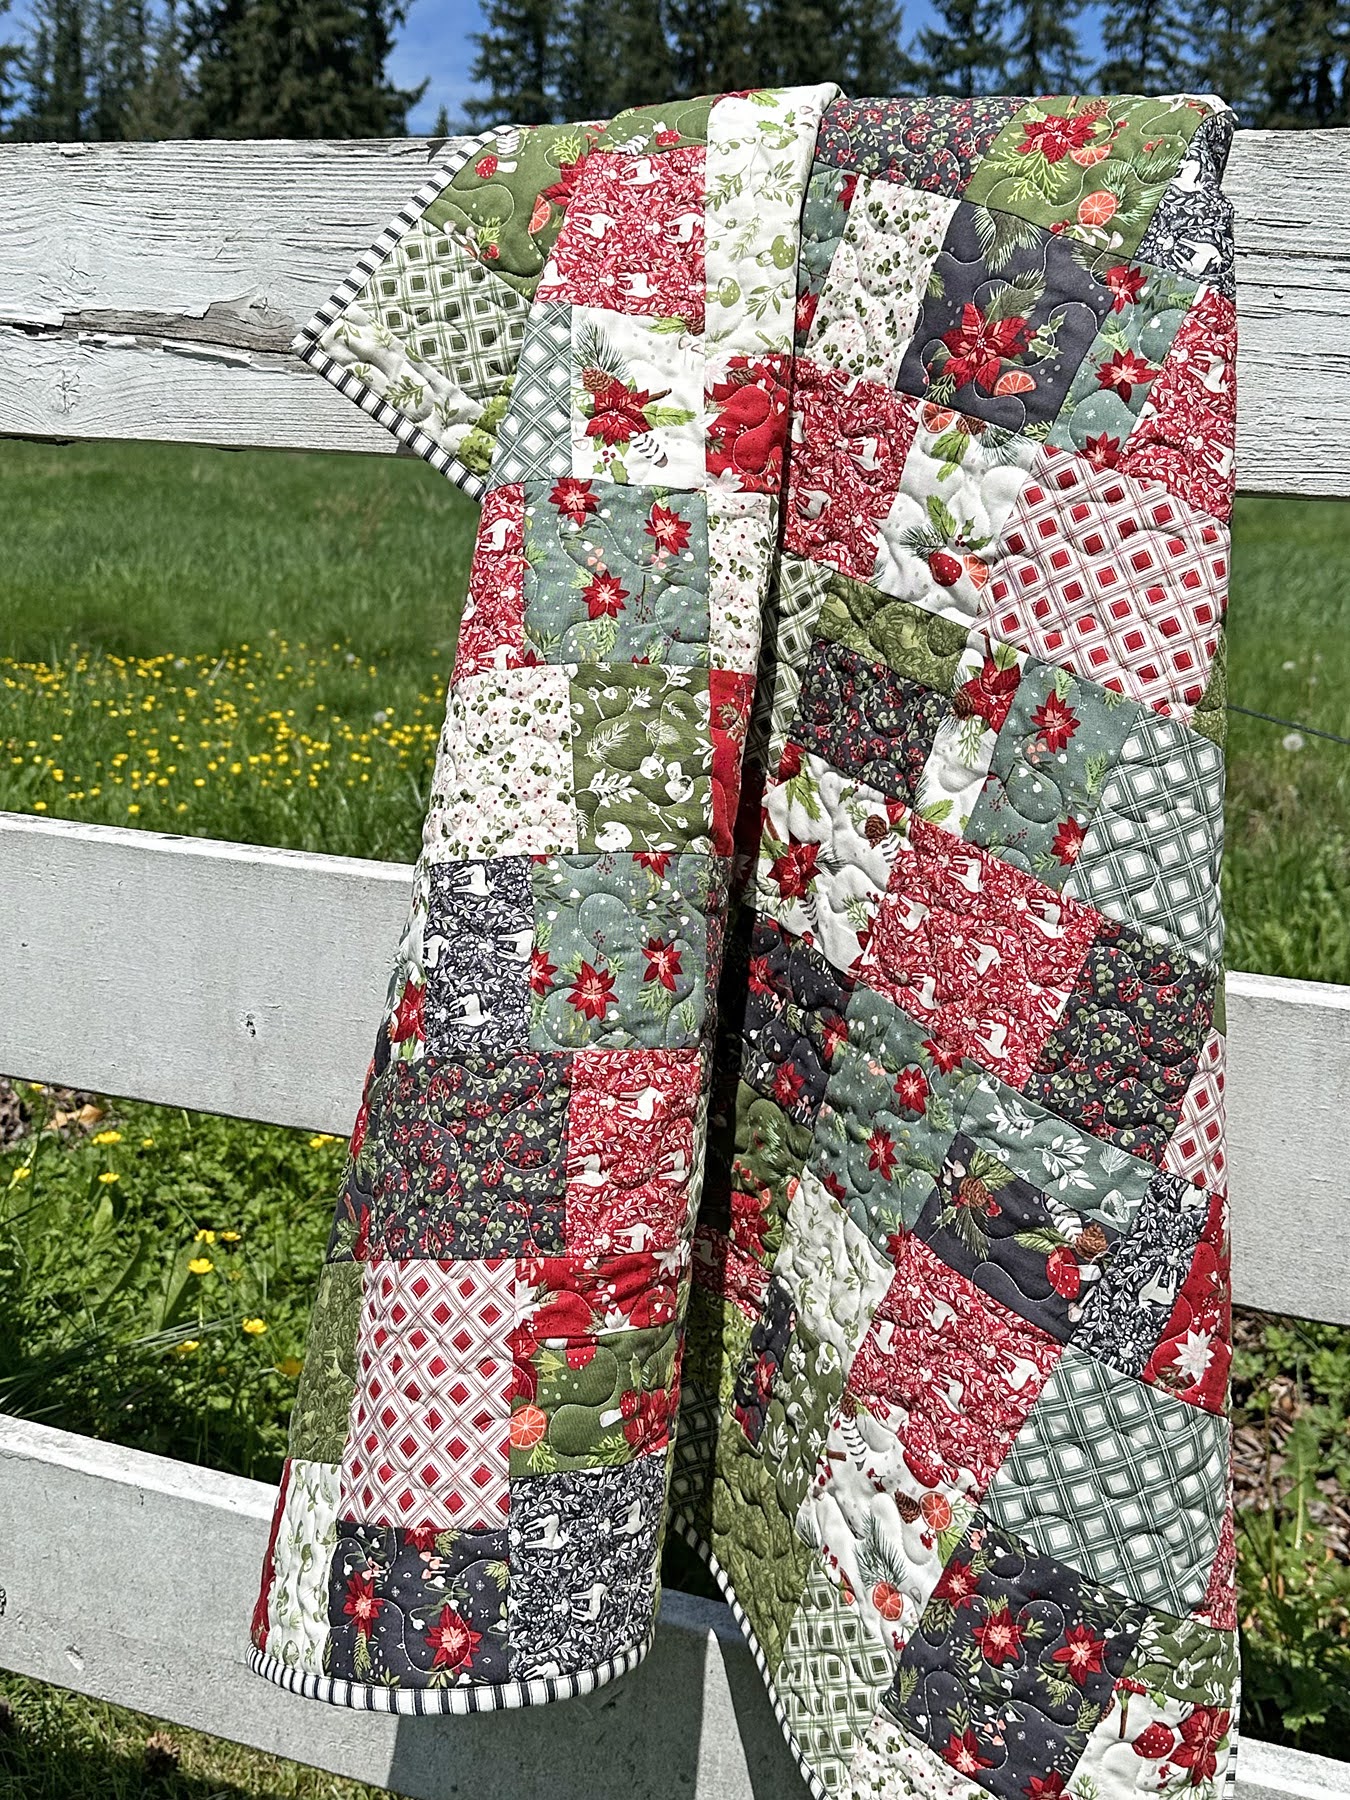
Timber Quilt: Yuletide Forest 

It is a reversible quilt!

A Bit of Scrap Stuff Blog #ABitofScrapStuff #timberQuilt #Rileyblakedesigns #quilt

Hi Quilty friends! Today I'm sharing my Timber Quilt featuring Yuletide Forest designed by Katherine Lenius for Riley Blake Designs.

Timber Quilt Pattern


Yuletide Forest is a classic Christmas collection with winter foliage and deer plus the most awesome coordinating panel that is perfect for making a reversible quilt.


Shop Fabric at Fat Quarter Shop  

A Bit of Scrap Stuff Blog #ABitofScrapStuff #timberQuilt #Rileyblakedesigns #quilt

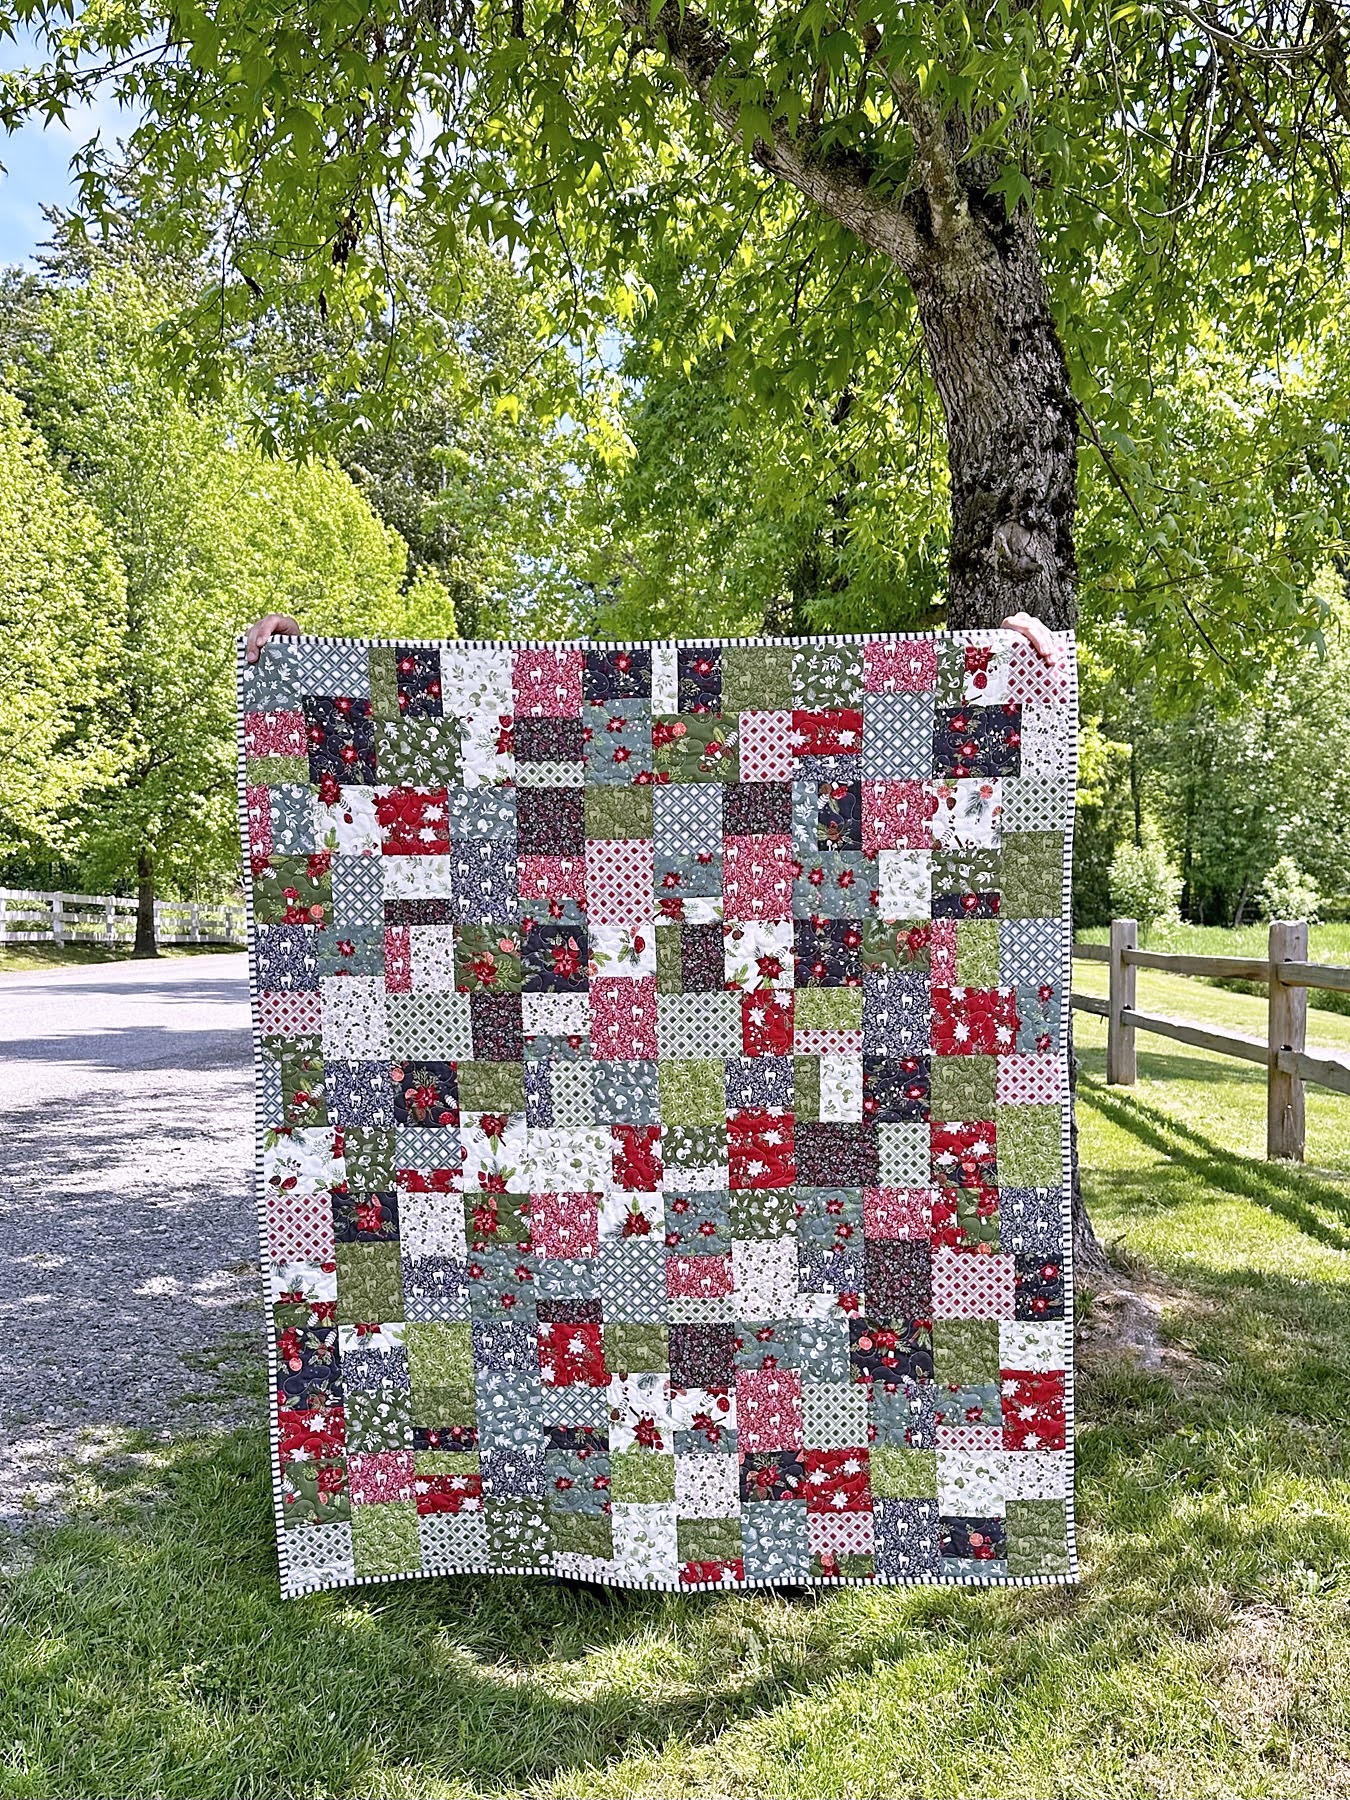
Timber Quilt 48.5" x 56.5"

Supplies:


A Bit of Scrap Stuff Blog #ABitofScrapStuff #timberQuilt #Rileyblakedesigns #quilt

The Yuletide Forest Stripe print is perfect for the binding! I love a striped binding!

A Bit of Scrap Stuff Blog #ABitofScrapStuff #timberQuilt #Rileyblakedesigns #quilt

The Timber Quilt pattern is a beginner friendly pattern that focuses on the prints from the Yuletide Forest collection as no background fabric is needed for this quilt! 

A Bit of Scrap Stuff Blog #ABitofScrapStuff #timberQuilt #Rileyblakedesigns #quilt

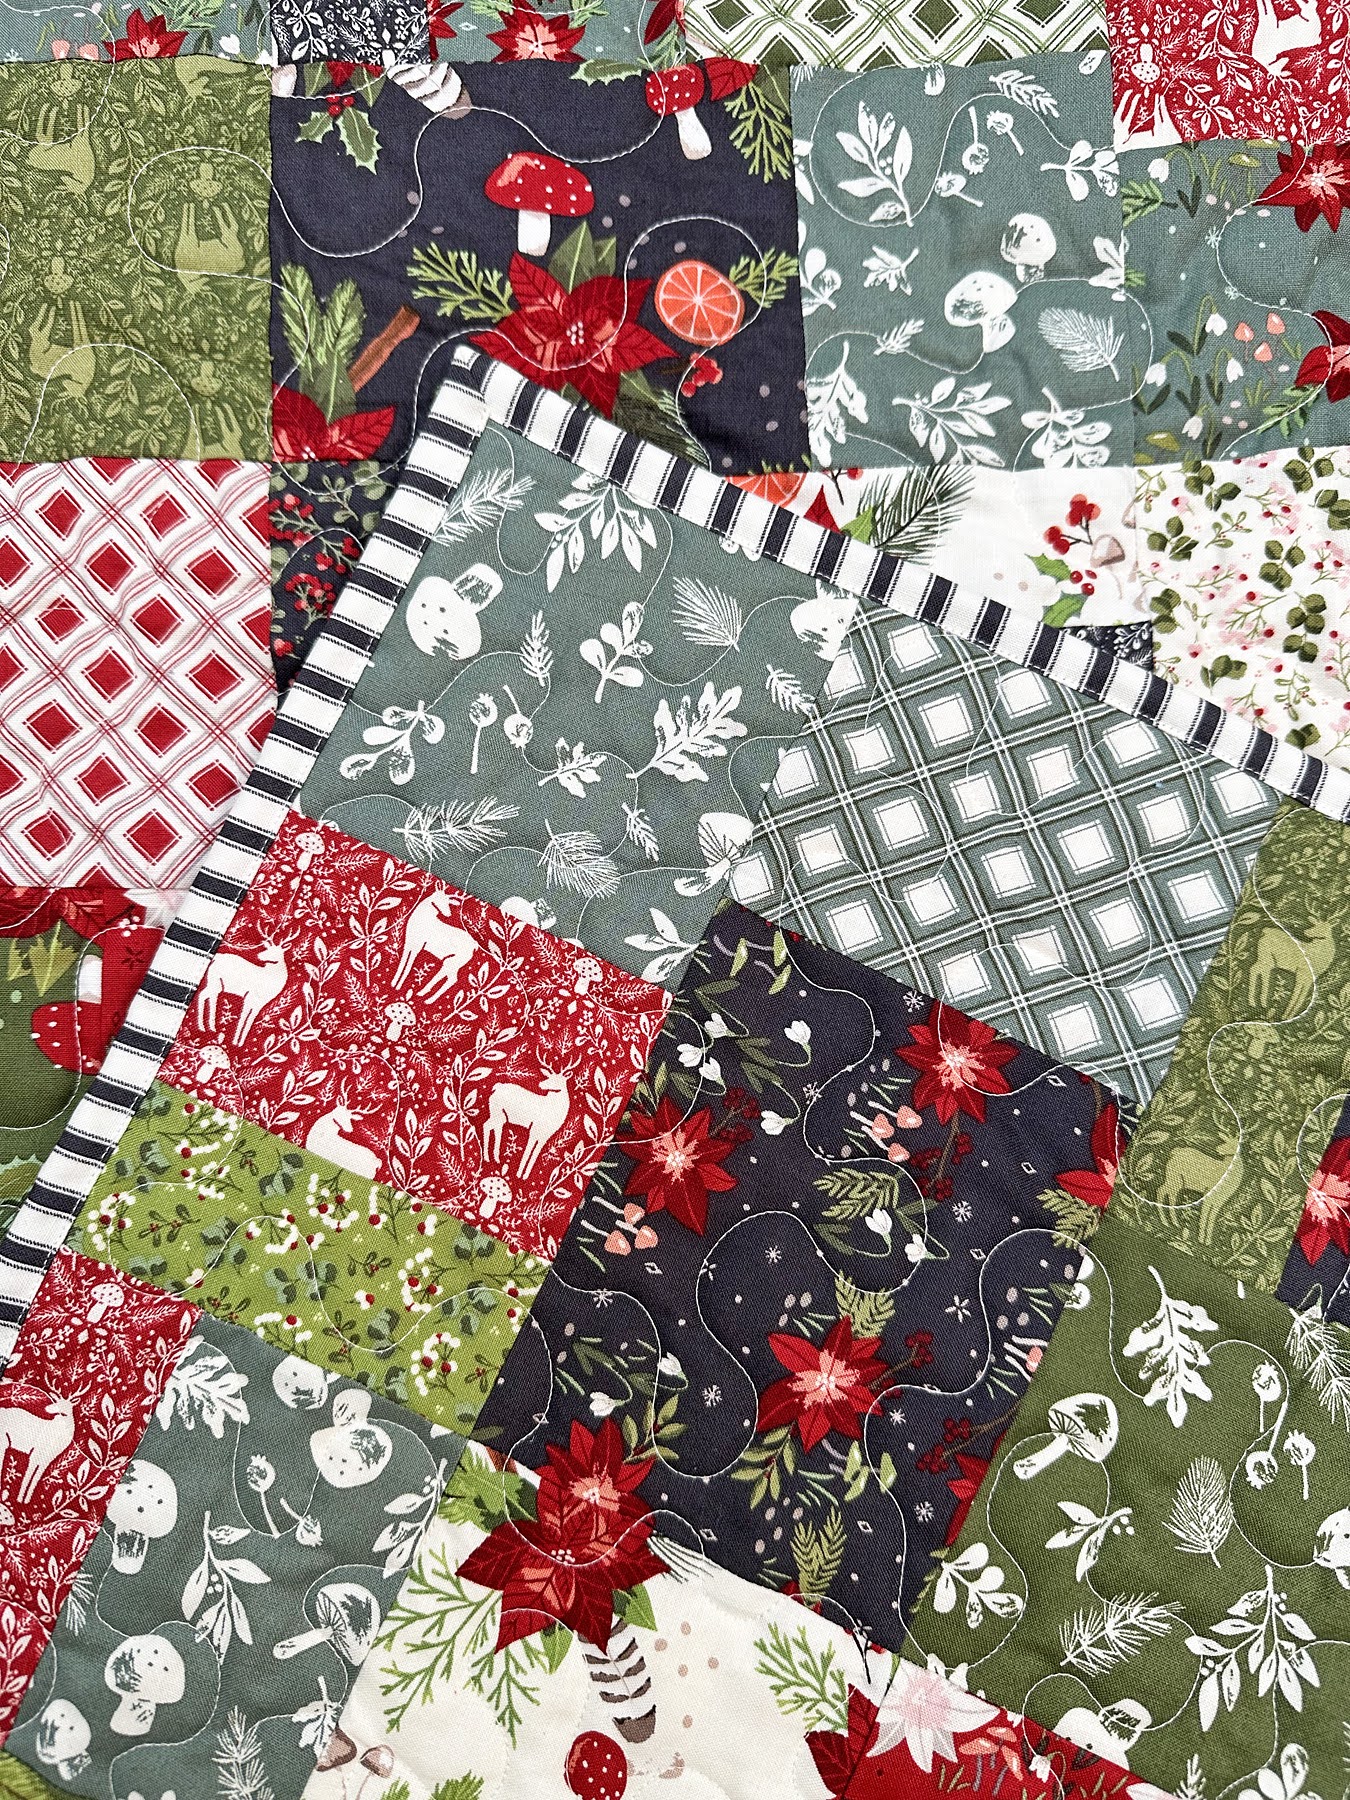
One 10" Stacker contains (42) 10" squares, which is exactly how many squares are needed to make the Timber Quilt. I chose to omit the striped 10" squares and substituted extra deer prints as they are my favorite! So if you also want to substitute a few of the prints - grab a few extra fat quarters of your favorite print. 

As the Timber Quilt is block based, you can easily adjust the size of your quilt by making more or less blocks. Each Timber block requires one 10″ x 10″ square. 

Timber Quilt Pattern


Accuquilt Dynamic Promo


Yuletide Forest Panel

A Bit of Scrap Stuff Blog #ABitofScrapStuff #timberQuilt #Rileyblakedesigns #quilt

The Yuletide Forest panel is 54" x 65" and is the most perfect backing! I did omit the borders from the Timber Quilt Pattern to avoid adding extra fabric to the panel edges. Of course, the Yuletide Forest Panel would also make a quick quilt - just add batting and backing!

A Bit of Scrap Stuff Blog #ABitofScrapStuff #timberQuilt #Rileyblakedesigns #quilt


I hope you enjoy making a Yuletide Forest: Timber Quilt for yourself or it is the perfect gift! 

Don't forget to follow me at A Bit of Scrap Stuff Blog and Instagram @ABitofScrapStuff for more sewing fun!

Melanie Call

#SunriseQuilt #ABitofScrapStuffPattern #RileyBlakeDesigns

Shop Fabric at Fat Quarter Shop


This post contains affiliate links. Thank you for supporting A Bit of Scrap Stuff. My family appreciates it!


Thursday, May 18, 2023

Sunrise Table Topper (or Wall Hanging) : Holiday Cheer

A Bit of Scrap Stuff Blog #ABitofScrapStuff #SunriseQuilt #RileyBlakeDesigns #Quilt #ChristmasQuilt

Hi Quilty friends! It's almost Christmas in July quilting season.  Are you ready to start sewing with the cutest Christmas Collection - Holiday Cheer. I loved choosing festive prints to make a Holiday table topper with the Sunrise Quilt Pattern

Holiday Cheer designed by My Mind's Eye for Riley Blake Designs is a vintage inspired Christmas collection with the cutest prints that are perfect for fussy cutting! I love the vintage Santas, stockings, wreaths, trees, and gingerbread cookies. So much Christmas cuteness!

Shop Fabric at Fat Quarter Shop

A Bit of Scrap Stuff Blog #ABitofScrapStuff #SunriseQuilt #RileyBlakeDesigns #Quilt #ChristmasQuilt

Sunrise Table Topper or Wall Hanging  24" x 24"

Supplies

A Bit of Scrap Stuff Blog #ABitofScrapStuff #SunriseQuilt #RileyBlakeDesigns #Quilt #ChristmasQuilt

Quarter-Square Triangle Block and Half-Square Triangle Block Tips


Accuquilt Dynamic Promo


Machine Quilting
I completed the machine quilting with my Janome Embroidery Machine using Kimberbell Clear Blue Tiles with the included winter design. It was sooooo easy and looks  perfect! I highly recommend the Kimberbell Clear Blue Tiles System. I used Glide 40wt white thread and Superior (Organ) 90/14 Top stitch needle and all the stitches were perfect!

A Bit of Scrap Stuff Blog #ABitofScrapStuff #SunriseQuilt #RileyBlakeDesigns #Quilt #ChristmasQuilt

Sunrise Pattern Adjustments for Table Topper

Make (1) Sunrise Block 

Cutting Instructions:

  • Red Text Fat Quarter: Cut (4) B; (4) D; (4) J
  • Mint Green Stocking Fat Quarter: Cut (1) A; (8) B; (4) J
  • Cream Wreath Fat Quarter: (8) H; (4) J
  • Dark Green Alpine Fat Quarter: (4) B; (8) G; (4) F; (4) J
  • Sashing Fabric: (4) Sashing Strips
  • Binding Fabric: (2) 2.5" x WOF strips
A Bit of Scrap Stuff Blog #ABitofScrapStuff #SunriseQuilt #RileyBlakeDesigns #Quilt #ChristmasQuilt


I hope you enjoy making a Holiday Cheer Table Topper for yourself or it is the perfect gift! 

Don't forget to follow me at A Bit of Scrap Stuff Blog and Instagram @ABitofScrapStuff for more sewing fun!

Melanie Call

#SunriseQuilt #ABitofScrapStuffPattern #RileyBlakeDesigns

Shop Fabric at Fat Quarter Shop


This post contains affiliate links. Thank you for supporting A Bit of Scrap Stuff. My family appreciates it!
 

Monday, May 15, 2023

Chain of Stars Quilt: Hey Bootiful


A Bit of Scrap Stuff Blog #ABitofScrapStuff #ChainofStarsQuilt #Quilt #RileyBlakeDEsigns

Chain of Stars Quilt: Hey Bootiful 

A Bit of Scrap Stuff Blog #ABitofScrapStuff #ChainofStarsQuilt #Quilt #RileyBlakeDEsigns

Hi Quilty Friends! Today I'm sharing my Chain of Stars Quilt featuring Hey Bootiful fabric designed by My Mind's Eye for Riley Blake Designs. The Hey Bootiful Collection is the perfect collection if you love "spooky cute" Halloween! Plus a few of the prints glow in the dark... so fun!

This image has an empty alt attribute; its file name is MG_1274HeyBootiful_MyMindsEye-1024x683.jpg

As I wanted to use allll the cute Hey Bootiful Fabrics, my Chain of Stars Quilt was the perfect match! Plus it's one of my favorite quilts to sew!

If you are new to quilting- Halloween Fabric arrives in Quilt Shops now so your Halloween projects can be done before the spooky day!

A Bit of Scrap Stuff Blog #ABitofScrapStuff #ChainofStarsQuilt #Quilt #RileyBlakeDEsigns

Chain of Stars Quilt 61.5" x 70.5"

Fabric Requirements:

A Bit of Scrap Stuff Blog #ABitofScrapStuff #ChainofStarsQuilt #Quilt #RileyBlakeDEsigns

Chain of Stars is a fabulous quilt for beginners as the stars are No Point Matching Stars, which means the points float in the background fabric so you don't have to match up the points when sewing blocks together - it's so much easier and your stars always have points! 

A Bit of Scrap Stuff Blog #ABitofScrapStuff #ChainofStarsQuilt #Quilt #RileyBlakeDEsigns

Chain of Stars Quilt is a block based quilt pattern so adjusting your quilt size is easy. One 10" square (plus background) makes 1 Chain of Stars Block. As I wanted to use the lighter prints in Hey Bootiful, I substituted 5 star background fabric with Dapple Dot Riley Gray and the white stars really shine now!

A Bit of Scrap Stuff Blog #ABitofScrapStuff #ChainofStarsQuilt #Quilt #RileyBlakeDEsigns

As I wanted my Chain of Stars Quilt a bit bigger, I added a border! Adding a border is a very quick and easy way to enlarge your quilt. Plus it is fun to choose your favorite print (or prints) to have a larger impact on your quilt!

A Bit of Scrap Stuff Blog #ABitofScrapStuff #ChainofStarsQuilt #Quilt #RileyBlakeDEsigns

OPTIONAL: Outer Border Instructions

The original Chain of Stars Quilt doesn't have a border, but adding an outer border is super easy! 

0.75 yard Black Border: Hey Bootiful Sheets Ghosts Charcoal Glow in the Dark

  • Cut (5) 4" x Length of Fabric (27"). This will have your ghosts floating upright for side borders.
  • Sew strips together to form one very long narrow strip
  • Measure quilt length. Example Quilt Length of 63.5"*. Cut (2) outer border strips 4" x 63.5"*. Sew (1) outer border strip to right side of quilt and (1) outer border strip to left side of quilt.

0.75 yard Orange Border: Hey Bootiful Sheets Ghosts Orange

  • Cut (4) 4" x Width of Fabric (40"). This will have your ghosts floating upright for top/bottom borders.
  • Sew strips together to form one very long narrow strip
  • Measure quilt width. Example Quilt Width of 61.5"*. Cut (2) outer border strips 4" x 61"*. Sew (1) outer border stripe to top of quilt and (1) outer border strip to bottom of quilt.

* Cut your border strips to the measured length and width of your quilt.

A Bit of Scrap Stuff Blog #ABitofScrapStuff #ChainofStarsQuilt #Quilt #RileyBlakeDEsigns

Don't forget to follow me at A Bit of Scrap Stuff Blog and Instagram @ABitofScrapStuff for more sewing fun!

Melanie Call

#ChainofStarsQuilt #ABitofScrapStuffPattern 

Shop Fabric at Fat Quarter Shop


This post contains affiliate links. Thank you for supporting A Bit of Scrap Stuff. My family appreciates it!

Monday, May 1, 2023

JANOME TUTORIAL: Layered Cupcake Pillow Pattern


A Bit of Scrap Stuff Blog #ABitofScrapStuff #LayeredCupcakePillow #Janome #JanomeMakes #JanomeMaker #SweetwaterFabric #QuiltedPillow

Hi  Friends! Today I'm excited to share a beginner friendly pillow pattern on the Janome Project Page and my blog too! The Layered Cupcake Pillow is perfect for left over 2.5" jelly roll strips or 5" charm packs or scraps. 

A Bit of Scrap Stuff Blog #ABitofScrapStuff #LayeredCupcakePillow #Janome #JanomeMakes #JanomeMaker #SweetwaterFabric #QuiltedPillow

The Layered Cupcake Pillow Pattern finishes at 16" x 16", which is a mini version of my Layered Cake Quilt Pattern.  I'm using a Stateside 5" Charm Pack by Sweetwater to create my Layered Cupcake Pillow. The patriotic prints are perfect for summer decor!

Fabric Requirements

Piecing Instructions


Row Style 1:

 - Sew together (4) A 2.5” x 4.5” rectangles.  A + A + A + A


Row measures 2.5” x 16.5”

-  Repeat step above until you have sewn (4) Row Style 1 rows.


Row Style 2:

- Sew together (3) A 2.5” x 4.5” rectangles. 

- Sew (1) B 2.5” x 2.5” square to each end. B + A + A + A + B


Row measures 2.5” x 16.5”

-  Repeat step above until you have sewn (4) Row Style 2 rows.


Pillow Front Assembly


1. Sew together Row 1 and Row 2 (alternating) until you have a total of 8 rows sewn together.


4.  Quilt and finish pillow with preferred method. 

  • I quilted my pillow with straight-line quilting using my Janome M7 with AcuFeed Foot and stitch length 3.5. 

A Bit of Scrap Stuff Blog #ABitofScrapStuff #LayeredCupcakePillow #Janome #JanomeMakes #JanomeMaker #SweetwaterFabric #QuiltedPillow

  • For zipper installation - I used my Reversible Zippered Pillow Tutorial. My Layered Cupcake Pillow is truly reversible because for the backing I used (16) 4.5" x 4.5" squares sewn together as a 16 patch (4 rows of 4 squares). 
A Bit of Scrap Stuff Blog #ABitofScrapStuff #LayeredCupcakePillow #Janome #JanomeMakes #JanomeMaker #SweetwaterFabric #QuiltedPillow


Zipper Pillow Finishing Tutorials:


I hope you enjoy making your Layered Cupcake Pillow! I can't wait to see what fabrics you will choose to make your own pillow!


Layered Cupcake Pillow Pattern PDF Pattern - here

A Bit of Scrap Stuff Blog #ABitofScrapStuff #LayeredCupcakePillow #Janome #JanomeMakes #JanomeMaker #SweetwaterFabric #QuiltedPillow

A Bit of Scrap Stuff Blog #ABitofScrapStuff #LayeredCupcakePillow #Janome #JanomeMakes #JanomeMaker #SweetwaterFabric #QuiltedPillow

Don't forget to follow me at A Bit of Scrap Stuff Blog and Instagram @ABitofScrapStuff for more sewing fun!

Melanie Call

#LayeredCupcakePillow #ABitofScrapStuffPattern #Janome #JanomeMakes

Shop Fabric at Fat Quarter Shop


This post contains affiliate links. Thank you for supporting A Bit of Scrap Stuff. My family appreciates it!