Showing posts with label Quilting. Show all posts

Saturday, February 6, 2016

Star Wars Quilt

Star Wars Quilt Free Quilt Pattern

I'm super excited to share my Star Wars Quilt today! I think this quilt might be my Star Wars loving family's favorite!

I really loved sewing with the new Star Wars Fabric by Camelot Cottons. The print quality and fabric softness of this collection is fabulous.  The hardest part of this quilt was choosing which fabrics to use.


This is a really quick and easy quilt top to make! I really wanted The Force Awakens Rebels fabric to standout so I kept the block simple by fussy cutting and adding borders.


This large lap size quilt is the perfect size for watching Star Wars movies and playing the Lego Star Wars video game. I think it will be our fave quilt for picnics this spring too! 


I started straight-line quilting the off-center strip first about 3/8" apart and LOVED it! So I thought....why not quilt the entire quilt with straight-lines 3/8" apart too. After MANY hours and bobbin changes, I finished and love the amazing quilting texture!


May The Force be strong with you as you make this quilt!


Be sure to tag us on instagram @fwfabricstudio and #sewingwithfwfabricstudio and me @mellierc

Thank you!
Melanie


Thursday, October 8, 2015

Halloween Pillow

I'm Melanie and I'm excited to be part of the Halloween fun at Fort Worth Fabric Studio! A bit about me: I married my high school sweetheart and we have 3 fabulous kids. My "fabric-ing" as my kids call it...usually happens at night while they are asleep. I like to listen to an audiobook or a podcast,  have a snack, and sew in the evenings- it's very relaxing to me. I share my sewing adventures on Instagram as mellierc.

I chose to create a large 20" pillow using the Economy Block or Square in a Square Block with the Happy Haunting fabric from Riley Blake.  I like non-scary Halloween, but my boys are starting to like scary stuff now....so this fabric is a bit of a compromise as it has skulls on it :).  So let's get started!


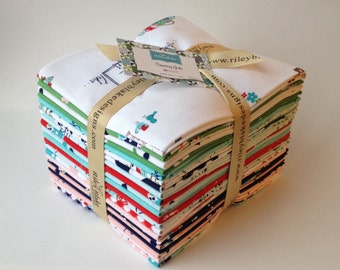
Fabrics needed to create the 20" Happy Haunting Pillow. No worries if pillows aren't your thing...just add binding and now you have a mini quilt!


From left to right:

Happy Haunting Gray Sticker Riley Blake: 2/3 yard (center squares and backing)

Swiss Dots Black Riley Blake: 1/2 yard (squares/triangles, border, and binding if you cut very carefully)

Happy Haunting Black Skull Riley Blake: 1/3 yard (squares/triangles)


Let's move onto cutting. Do cut carefully as there isn't much left over especially the Swiss Dots fabric  if you are wanting to have enough to making binding as well. The image below does show strips for binding, which I decided not use in the end for my pillow.


Happy Haunting Gray Sticker Riley Blake: Cut nine 3.5" x 3.5" squares. (fussy cut if desired). Remaining fabric is for backing.  I cut my pillow backing pieces prior to cutting my nine squares to make sure I had large enough pieces of fabric to create my pillow back.


Swiss Dots Black Riley Blake Cut ten 4.5"x4.5" squares and eight  3.5" x 3.5" squares. Cut four 1.25" x 21" strips for border-they are a bit long to allow for trimming after being sewn on. (If you prefer a 21" finished size square to make your 20" pillow cut the four strips 1.75"x 21-22" for border). If you cut very carefully and use the thinner border strip, there will be enough left over for optional 2" binding strips.


Happy Haunting Black Skull Riley BlakeCut eight 4.5"x4.5" squares and ten  3.5" x 3.5" squares.


Step 2 cutting. Cut the  4.5"x4.5" squares and 3.5" x 3.5" squares in half to make triangles as shown below. 


Time to start sewing.   

1. Center one 3.5" black triangle on the center block gray square and sew with 1/4" seam. 
Notes: All seams while creating blocks and pillow front are 1/4" seam. The triangles are a bit oversized so we can trim our economy blocks down to the correct size. I think the blocks are more accurate this way. So keep your ruler and rotary cutter handy :).


2. Now repeat with the opposite side.


3. Press block and trim off excess triangle edges.


4. Add 2 more 3.5" triangles to remaining sides as shown above to complete the first square.


5. Trim block to 4.75". This is approximately 0.25" past each point on the center square.


6. To create the outside square. Sew the white  4.5" triangles on all four sides like you did with the black fabric earlier. Then trim block to 6.5". This is approximately 0.25" past each point on the second square.


7. Sew five 6.5" blocks with the white outer square and four 6.5" blocks with the black outer square.


Assembling your pillow
8. Sew together your nine 6.5" blocks. Choose your favorite arrangement or follow my example below. Then add border strips. I wait to trim the length of my border strips until after I have sewn the strips on- then I trim them off when I square it up. 

I trimmed my square to 20" as I like a tight fit on my pillow. If want to follow Lindsey's fantastic Envelope Pillow Instructions, use the 1.75" border strips and trim your pillow front to 21". 

9.  Cut a piece of batting about 1" larger on all four sides from your pillow front. Lay your pillow front on top of batting- be sure to place in the center and right side up. Quilt as desired. I chose to quilt mine in a 2" diagonal grid pattern.

10. After quilting the pillow front, it's time to make your favorite pillow closure. 


Now it's time to enjoy your Halloween pillow! I'm pretty sure mine will stay out until Halloween as my boys love the large size :) 

Thank you Fort Worth Fabric Studio for inviting me to share my tutorial!

Be sure to tag me on Instagram if you make a pillow too!


Thursday, December 25, 2014

Christmas Sewing

I was able to finish a few things this year for Christmas gifts!!! I'm linking up with Porch Swing Quilts Santa's Sweatshop.

It was my Aunt's turn for a quilt this year and she loves her cat...so a kitty quilt for her!


I made my Grandma and Mom new potholders. I love the ruffle...fabulous pattern by Nana Company


I even made myself a Christmas Tree pillow. Pattern also by Nana Company.


I was glad to get so much done this year!!!

Sunday, December 7, 2014

2014 Inspiration Palooza

I only finished one quilt completely in 2014. It is a quilt for my sweet baby girl who was also born this year....baby cuddling is the best!
I love this quilt as I used Scrumptious by Bonnie and Camille (my fave designers).


My goal for 2015 is to finish twin sized quilts for my boys.

Zombie quilt

Minecraft pixel quilt


I'm linking up with The Champ Life today...she is giving away 4 amazing Bonnie & Camille Charm packs :). 


Saturday, July 12, 2014

Finish Along Quarter 3 Goals

I'm listing my sewing goals for the next The Littlest Thistle finish along Q3. I know I will not complete my list, but since I like to hop between projects...I listed all of my WIPs :).

Quilts:

Zombie Apocalypse for oldest son


Minecraft Creeper for my middle son (pattern is pixel squares)


Quilty Fun Bee Along for me :)


Red Letter Day with Country Girls

Country Girls
Other sewing projects:
Blanket gift for friend at work (she's still on maternity leave)

More baby bibs for little girl...not sure which fabrics yet...but love this pattern

http://heatherbailey.typepad.com/links/slobber-monkey-baby-bib-pattern.html

Complete my mini spool mug kit from Sew-Lux fabrics (my kits are yellow and aqua)

This Mini swoon pattern just came in the mail....hope to make a mini or a mug rug

Noodle Head Super Tote with Joel Dewberry fabric
Wow...I have a lot of projects to do/finish :)

Wednesday, June 4, 2014

Baby items

I've made a few items for sweet baby girl! I'm so glad to be able to use pink and purple plus flowers finally!!!

First I made a quilt with Scrumptious fabric and pattern by Moda Bakeshop. Love the pinwheels and prairie points. Here are a few pictures (I still need to take photos after I wash the quilt so you can see all the crinkles!)

Before quilted
Don't worry I do NOT leave the quilt in her crib...this was only for the photo.


Plus I've made a few bibs too. Here is one using Heather Bailey's free pattern. I do like to back my bibs with a soft chenille so it's extra absorbent. 


I'll share more soon :)

Sunday, April 13, 2014

Finish Along Quarter 2

I'm going to try and finish most of my sewing WIP projects. I've listed quite a few so I'm not sure if I will complete them all...but I'm going to try! I'm linking up with The Littlest Thistle: Finish Along Quarter 2. 

1. Baby girl's quilt. I'm almost done with this one...just need to finish the binding then wash! I love Bonnie and Camille's Scrumptious fabric!


2. Baby Receiving blanket. A friend of mine just had a baby boy a few weeks ago...I need to get going on this simple, but snuggly project.


3. Lori Holt's Quilty Fun Quilt A long. I was doing well on this quilt, but then haven't sewn for the month since baby girl arrived. 

4. Zombie quilt for my oldest son


5. Minecraft creeper quilt for my youngest son

I hope to get at least the first 3 projects finished and the last 2 started...maybe even done :)

Melanie