Friday, May 6, 2022

Temple Panel Quilt - Free Pattern

A Bit of Scrap Stuff Blog #ABitofScrapStuff #RileyBlakeDesigns #Quilt

Hi Quilty Friends! I’m excited to share my Temples Panel Quilt featuring the new Temples Panel. I love using Riley Blake Designs Panels as the quality is fabulous plus panels create beautiful quilts so quickly! 

The Temples Collection includes 5 Temple Panels plus coordinates perfectly with the Called to Serve Collection.


A Bit of Scrap Stuff Blog #ABitofScrapStuff #RileyBlakeDesigns #Quilt

The Temples Panel Quilt features a fun border that was inspired by the Free Quilt Pattern: Wiggles Emma Quilt designed by Riley Blake Design TeamTwo quilts can look so different even when the same pattern is used!

Accuquilt Dynamic Promo

A Bit of Scrap Stuff Blog #ABitofScrapStuff #RileyBlakeDesigns #Quilt

Temples Panel Quilt - 49" x 56"

Supplies:

A Bit of Scrap Stuff Blog #ABitofScrapStuff #RileyBlakeDesigns #Quilt

Pattern Adjustment

I choose to substitute (2) 6 1/2" x 6 1/2" squares of Called to Serve Temples Blue fabric for the corners instead of an additional pieced block per pattern instructions. It is an easy change and looks fabulous! 

Fat Quarter Shop Daily Flash Sale

A Bit of Scrap Stuff Blog #ABitofScrapStuff #RileyBlakeDesigns #Quilt

I hope you make a Temples Panel Quilt for your favorite newlyweds or missionary or family member or friend or yourself! This quilt will become a treasured gift!

Be sure to follow me on Instagram @ABitofScrapStuff and on my A Bit of Scrap Stuff Blog for more fabric fun!


Have a great day and happy quilting and stitching! 

Melanie 

Fat Quarter Shop Quilting Fabrics and Supplies


Sulky.com

This post contains affiliate links. Thank you for supporting A Bit of Scrap Stuff. My family appreciates it!

Wednesday, May 4, 2022

GO! Mother's Day Zipper Pouch - free pattern

A Bit of Scrap Stuff Blog #ABitofScrapStuff #RileyBlakeDesigns #AccuQuilt #AQGOGetter #ZipperPouch

Hi sewing friends! Today I'm sharing the perfect zipper pouch that is reversible! One side features a sweet Spool Block with an appliqué sewing machine and the reverse is personalized for MOM.  Plus the GO! Mother's Day Zipper Pouch is a FREE pattern - download here.

A Bit of Scrap Stuff Blog #ABitofScrapStuff #RileyBlakeDesigns #AccuQuilt #AQGOGetter #ZipperPouch

Sewing a zipper pouch is a favorite project of mine as it is cute and so useful! I also love trying new techniques - such as machine appliqué . I chose to machine appliqué with the blanket stitch on my Janome M7 or you may use the included embroidery designs by AccuQuilt

                 Accuquilt Dynamic Promo

Sewing Time
It is time to gather up supplies so you can make a GO! Mother's Day Zipper Pouch. Approximate 10" x 12"

Supplies:
Clickable links below


AccuQuilt Dies:
  • 1/4 yard Dark Pink
  • 1/2 yard Medium Pink
  • 1/4 yard Pink
  • 1/2 yard Light Pink
  • 1/4 yard White
  • 1/4 yard Light Gray
  • 5" x 5" Dark Gray
Other:
A Bit of Scrap Stuff Blog #ABitofScrapStuff #RileyBlakeDesigns #AccuQuilt #AQGOGetter #ZipperPouch

The GO! Mother's Day Zipper Pouch is so EASY to customize! I chose to used 4 different shades of Riley Blake Designs Basics: Kisses and Swiss Dots to create a pink ombre effect. But if pink isn't your favorite color - any color would be absolutely fabulous! 

I absolutely LOVE to use AccuQuilt GO! dies for perfect cutting of my fabric. There is zero chance that I could hand cut the cute little sewing machine nor the M O M letters so perfectly.

A Bit of Scrap Stuff Blog #ABitofScrapStuff #RileyBlakeDesigns #AccuQuilt #AQGOGetter #ZipperPouchA Bit of Scrap Stuff Blog #ABitofScrapStuff #RileyBlakeDesigns #AccuQuilt #AQGOGetter #ZipperPouch


Who do you plan on making the GO! Mother's Day Zipper Pouch for? Your Mom, Daughter, Grandma, Aunt, Friend, Yourself, or Everyone

Don't forget to download your free pattern: 

I can't wait to see your projects!!!

A Bit of Scrap Stuff Blog #ABitofScrapStuff #RileyBlakeDesigns #AccuQuilt #AQGOGetter #ZipperPouch


A Bit of Scrap Stuff Blog #ABitofScrapStuff #RileyBlakeDesigns #AccuQuilt #AQGOGetter #ZipperPouch


Be sure to follow me on Instagram @ABitofScrapStuff and on my A Bit of Scrap Stuff Blog for more fabric fun!

Happy Sewing!

Melanie Call

Fat Quarter Shop Quilting Fabric, Kits, Notions and Patterns


Sulky.com 

 This post contains affiliate links. Thank you for supporting A Bit of Scrap Stuff. My family appreciates it!



 

Monday, May 2, 2022

JANOME TUTORIAL - Reversible Zippered Pillow in 15 minutes!


A Bit of Scrap Stuff Blog #ABitofScrapStuff #Janome #JanomeMaker #RileyBlakeDesigns #tutorial

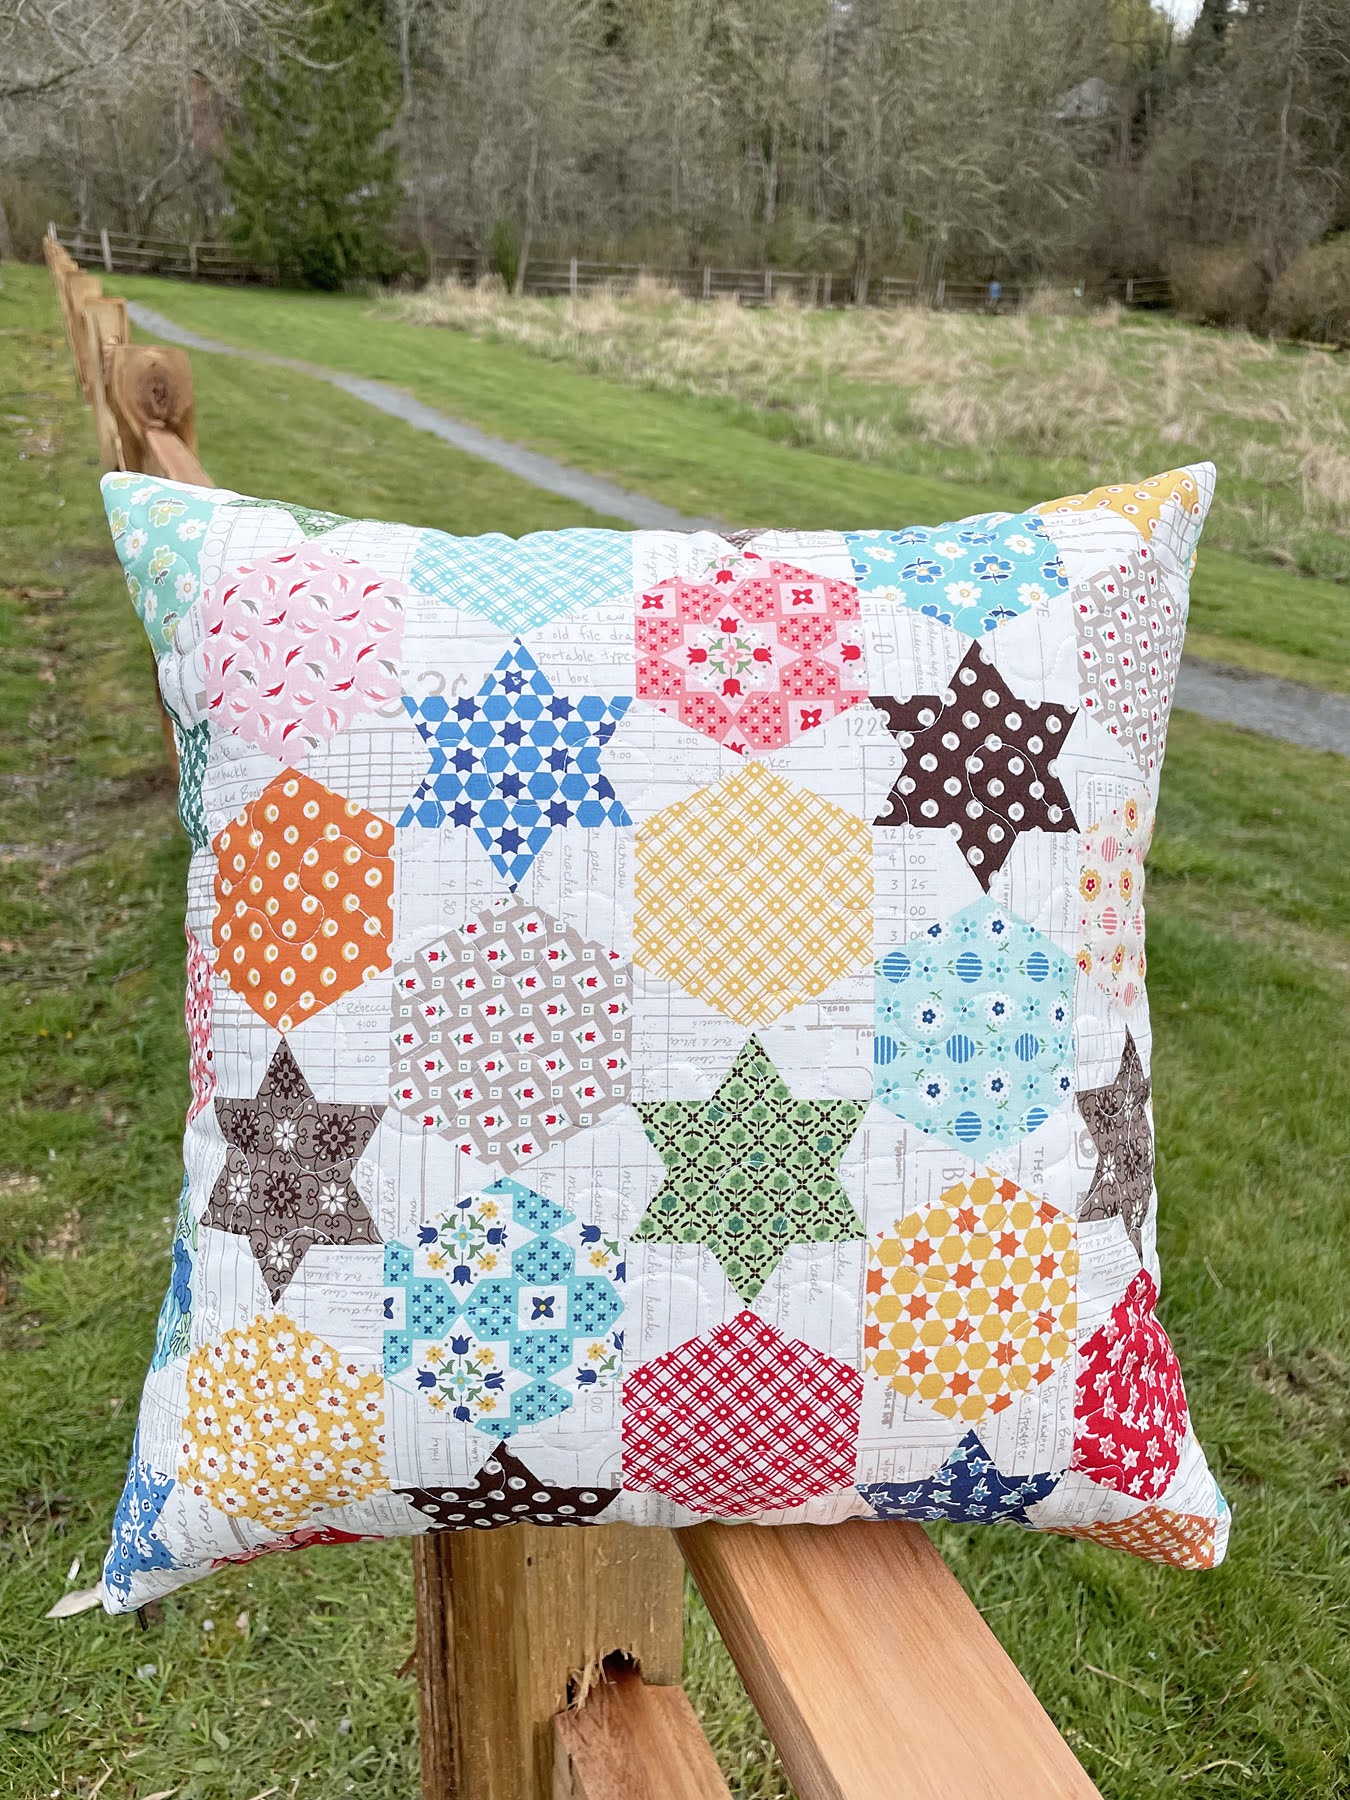
Hi Sewing Friends! Today I'm excited to share a tutorial for a Reversible Zippered Pillow that you can sew in 15 minutes, which includes installing a zipper! Don't worry if zippers make you nervous ... this method is super easy!

I'll be making my Reversible Zippered Pillow with my fabulous Janome M7 sewing machine. 

A Bit of Scrap Stuff Blog #ABitofScrapStuff #Janome #JanomeMaker #RileyBlakeDesigns #tutorial

I absolutely LOVE to sew pillows for my home! A pillow is an easy and affordable home decor project. Plus this reversible pillow can be made in 15 minutes - hooray! 

The Reversible Zippered Pillow is perfect for your fabric stash of panels, cheater prints, or large scale prints that you don't want to cut into tiny pieces! Today I'm using the Flea Market Fabric collection designed by Lori Holt for Riley Blake Designs. I just LOVE this cheater print!!!


Fat Quarter Shop Quilting Fabric, Kits, Notions and Patterns

A Bit of Scrap Stuff Blog #ABitofScrapStuff #Janome #JanomeMaker #RileyBlakeDesigns #tutorial

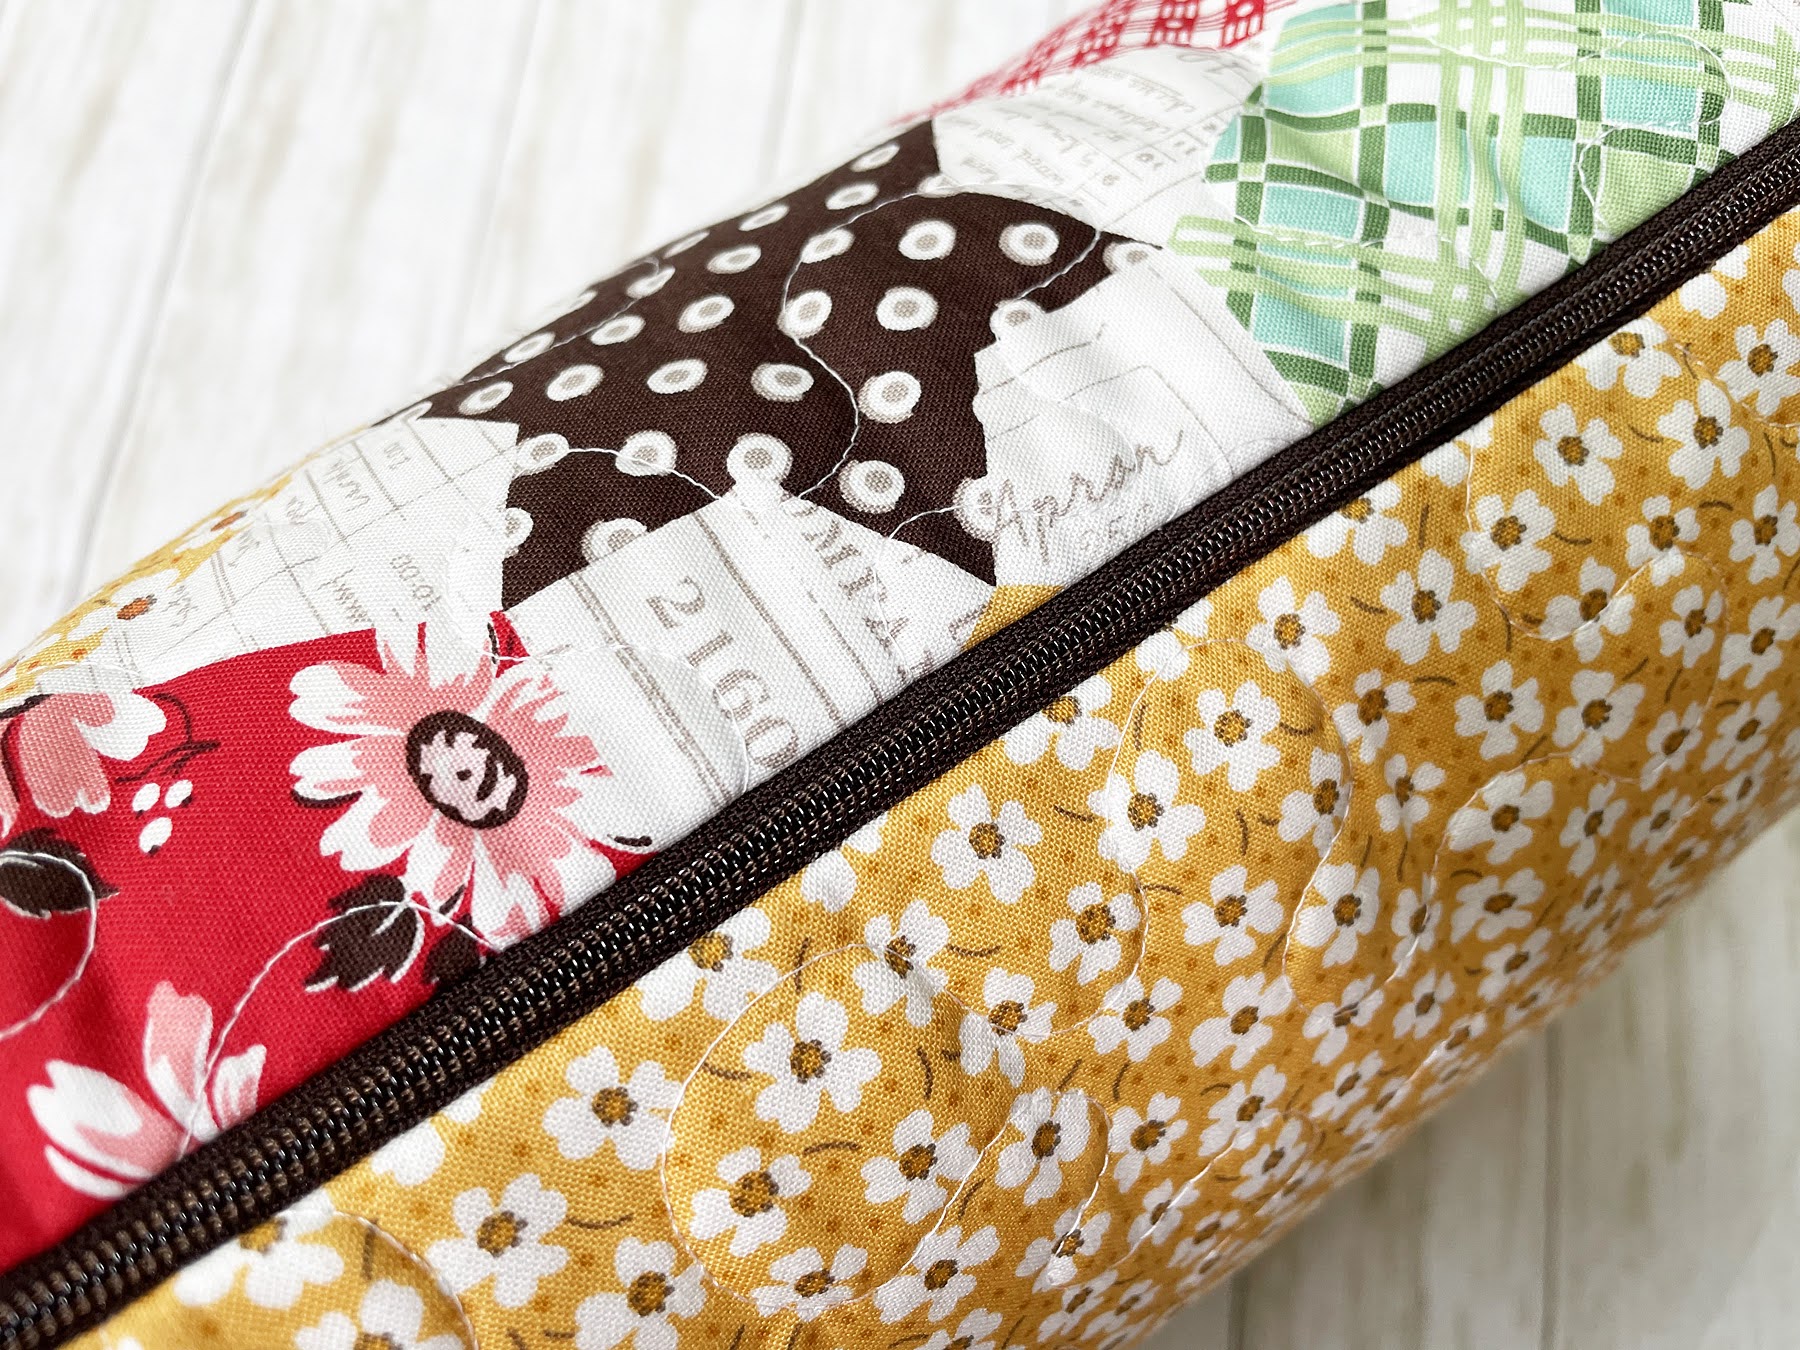
Installing a zipper into my pillow cover is a must sew detail for me. My pillows are used by my three kids so I need to be able to remove the pillow cover and wash it.   Apparently Mom's handmade pillows are the best for laying on while relaxing ;). 

It's Tutorial Time .....  
PS - Adding optional details of quilting your pillow exterior fabric and/or overcasting your seams may add a bit of extra time, but so worth it!

Reversible Zippered Pillow Tutorial

A Bit of Scrap Stuff Blog #ABitofScrapStuff #Janome #JanomeMaker #RileyBlakeDesigns #tutorial


Supplies:
Optional Feet:
  • Janome AcuFeed Single Foot holder 9mm VD
  • Janome AcuFeed Zipper Foot (single) 9mm ED
  • Janome Overcasting Foot - M
  • Janome Free Motion/ Darning Foot
A Bit of Scrap Stuff Blog #ABitofScrapStuff #Janome #JanomeMaker #RileyBlakeDesigns #tutorial

Note: You may choose to assemble your pillow using the Janome 1/4" O foot and Zipper E Foot OR the AcuFeed Single Foot Holder VD and Zipper ED Foot. I would recommend using the AcuFeed foot for bulky fabrics or if you like the extra control with the AcuFeed system. I will be using the  Janome 1/4" O foot and Zipper E Foot for the tutorial as they are common feet for all Janome Machines.


Step 1: Fuse Pellon Fusible Fleece to wrong side of exterior fabric per manufacturer instructions. 

OPTIONAL: Free motion quilt with Janome Free Motion/Darning Foot OR use the AcuFeed Flex VD Foot to quilt straight lines on Exterior Fabrics.

Step 2: Place zipper right side down along bottom edge of Pillow Front Exterior Fabric. Use Wonder Clips or pins to hold zipper in place.  
  • Hint: As zipper is oversized and nylon, you may have zipper ends overhang one or both side(s) of the pillow edge. Be sure that the metal zipper stops are not within 1/2" of pillow edge or you may accidentally sew over the metal zipper stops, which will make you and your machine unhappy.

A Bit of Scrap Stuff Blog #ABitofScrapStuff #Janome #JanomeMaker #RileyBlakeDesigns #tutorial

Step 3: Attach Janome Zipper Foot E and move needle position to left. I like to use Stitch 4 on my Janome M7.  Line edge of zipper foot along edge of zipper tape and sew zipper to Pillow Exterior Front. Seam allowance is 1/4" - 3/8" (may vary based on width of zipper foot and/or how far left needle is)

A Bit of Scrap Stuff Blog #ABitofScrapStuff #Janome #JanomeMaker #RileyBlakeDesigns #tutorial


Step 4: Place Pillow Exterior (front and back) RIGHT sides together. Align bottom edge of Pillow Exterior Back to unattached zipper side. Make sure Pillow Exterior right and left sides are aligned. Use Wonder Clips or pins to hold zipper in place.  

A Bit of Scrap Stuff Blog #ABitofScrapStuff #Janome #JanomeMaker #RileyBlakeDesigns #tutorial

Step 5: Line edge of zipper foot along edge of zipper tape and sew zipper to Pillow Exterior Back. (Refer to Janome M7 setting in Step 3.

A Bit of Scrap Stuff Blog #ABitofScrapStuff #Janome #JanomeMaker #RileyBlakeDesigns #tutorial

The zipper should now be installed along the bottom edge of Pillow Exterior Front and Back.

A Bit of Scrap Stuff Blog #ABitofScrapStuff #Janome #JanomeMaker #RileyBlakeDesigns #tutorial

OPTIONAL Step 6: Attach Overcasting M Foot. Overcast both seams along zipper tape edge. This optional step takes just a few minutes, but makes your pillow interior look much nicer and prevents fraying of Exterior Fabric. I used Overcasting Stitch 16 factory settings on my Janome M7.

A Bit of Scrap Stuff Blog #ABitofScrapStuff #Janome #JanomeMaker #RileyBlakeDesigns #tutorialA Bit of Scrap Stuff Blog #ABitofScrapStuff #Janome #JanomeMaker #RileyBlakeDesigns #tutorial


Step 7:  With Pillow Exterior Fabrics  RIGHT sides together, place pillow with Pillow Exterior Back Fabric on top. Make sure zipper is laying down completely flat. Open zipper half way. Use Wonder Clips to hold Pillow Exterior Fabrics together to avoid shifting when sewing exterior sides together.
  • Note: If Pillow Exterior Back top edge of fabric is slightly longer than Pillow Exterior Front when zipper is laying flat on pillow backing - trim off excess fabric (there should not be more than 1/4" of excess fabric)

A Bit of Scrap Stuff Blog #ABitofScrapStuff #Janome #JanomeMaker #RileyBlakeDesigns #tutorial

A Bit of Scrap Stuff Blog #ABitofScrapStuff #Janome #JanomeMaker #RileyBlakeDesigns #tutorial


Step 8: Attach 1/4" O Foot. Move needle position to 1/4" (Quilt Menu - Stitch 2). Sew 1/4" seam allowance along pillow right/left sides and top. Be sure to backstitch when starting and stopping.  
  • Hint: I like to start stitching where the zipper is so when I back stitch, I am also securing the edge of my zipper closed. 

A Bit of Scrap Stuff Blog #ABitofScrapStuff #Janome #JanomeMaker #RileyBlakeDesigns #tutorial

A Bit of Scrap Stuff Blog #ABitofScrapStuff #Janome #JanomeMaker #RileyBlakeDesigns #tutorial


OPTIONAL Step 9: Attach Overcasting M Foot. Overcast side and top seams. This optional step takes just a few minutes, but makes your pillow interior look much nicer and prevents fraying of Exterior Fabric. I used Overcasting Stitch 16 factory settings on my Janome M7. See image in Step 6.

A Bit of Scrap Stuff Blog #ABitofScrapStuff #Janome #JanomeMaker #RileyBlakeDesigns #tutorial

A Bit of Scrap Stuff Blog #ABitofScrapStuff #Janome #JanomeMaker #RileyBlakeDesigns #tutorial

Step 10: Clip excess fabric from top corners of pillow. Do not cut through sewn line. 
Turn pillow inside out and enjoy!
A Bit of Scrap Stuff Blog #ABitofScrapStuff #Janome #JanomeMaker #RileyBlakeDesigns #tutorial


A Bit of Scrap Stuff Blog #ABitofScrapStuff #Janome #JanomeMaker #RileyBlakeDesigns #tutorial

I hope you choose your favorite fabrics and make yourself (or a friend) a new pillow to enjoy!

A Bit of Scrap Stuff Blog #ABitofScrapStuff #Janome #JanomeMaker #RileyBlakeDesigns #tutorial


Be sure to follow me on Instagram @ABitofScrapStuff and on my A Bit of Scrap Stuff Blog for more fabric fun!

Happy Sewing!

Melanie Call

Fat Quarter Shop Quilting Fabric, Kits, Notions and Patterns


Sulky.com 

 This post contains affiliate links. Thank you for supporting A Bit of Scrap Stuff. My family appreciates it!