Showing posts with label Sandy Gervais. Show all posts

Monday, February 15, 2021

Oh Happy Day Pillows PLUS Tutorial

  A Bit of Scrap Stuff Blog #ABitofScrapStuffBlog #FreeTutorial #Pillow #QuiltedPillow #RileyBlakeDesigns #SandyGervais

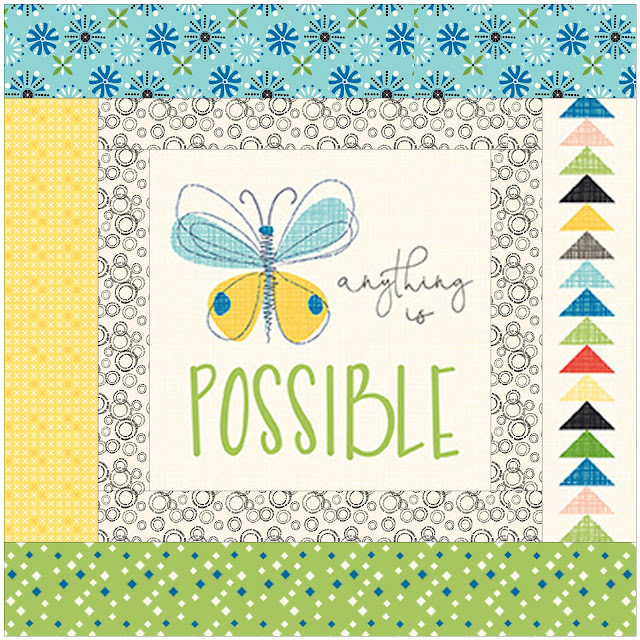
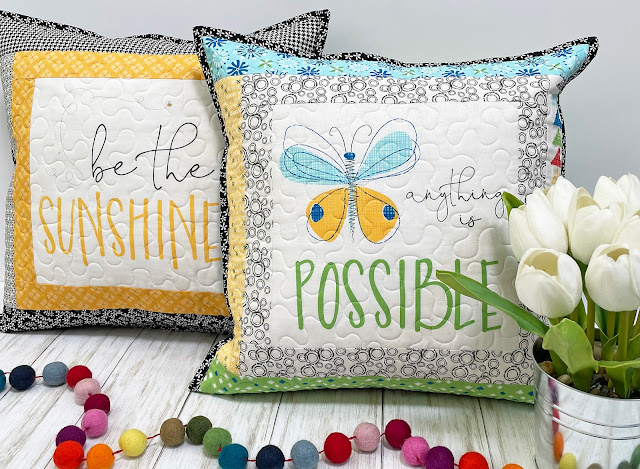
Mondays are a great day to start a new project! Today I'm sharing my Oh Happy Day Pillows PLUS tutorial so you can make pillows to brighten up your home! The pillows are quick to make as the center square is from the cute Oh Happy Day panel from the Oh Happy Day Collection designed by Sandy Gervais for Riley Blake Designs.  Just look at this happy collection of fabric!!!!


I love making new pillows for my home as it is an affordable way to add new decor! Plus I super love that they are handmade by me! Pillows are also a project that you are able to finish in a day. The fact that pillows are affordable, quick to make, and easy to match your decor...make them one of my favorite sewing projects!!! 

It's time for a tutorial to make the Oh Happy Day Pillow Top. Hint - I will be sharing upcoming tutorials soon for making a exposed zippered pillow backing and machine binding.
A Bit of Scrap Stuff Blog #ABitofScrapStuffBlog #FreeTutorial #Pillow #QuiltedPillow #RileyBlakeDesigns #SandyGervais

Oh Happy Day Pillow 18.5" x 18.5"

Supplies:
  • (1) Oh Happy Day Panel - Oh Happy Day Fabric designed by Sandy Gervais for Riley Blake Designs
  • 1/4 yard inner border - Oh Happy Day Fabric designed by Sandy Gervais for Riley Blake Designs
  • (4) 3" x WOF strips (at least 18.5" in length) - Oh Happy Day Fabric designed by Sandy Gervais for Riley Blake Designs
  • 1/4 yard binding - Oh Happy Day Fabric designed by Sandy Gervais for Riley Blake Designs
  • 3/4 yard backing fabric - Oh Happy Day Fabric designed by Sandy Gervais for Riley Blake Designs
  • 22" x 22" square of batting
  • 22" x 22" square of scrap or solid fabric (this fabric will the hidden inside the pillow)
  • 18" Pillow Form - I like Hobbs Brand Pillow Inserts
  • Optional 20" or longer nylon zipper - for zippered pillow backing
A Bit of Scrap Stuff Blog #ABitofScrapStuffBlog #FreeTutorial #Pillow #QuiltedPillow #RileyBlakeDesigns #SandyGervais


Tutorial for Oh Happy Day Pillow 

A. Cutting Instructions

Oh Happy Day Panel
  • Cut (1) 10.5" x 10.5" square. Label A
Inner Border Fabric
  • Cut (2) 2" x 10.5" strips. Label B
  • Cut (2) 2" x 13.5" strips. Label C
Outer Border Fabric(s)
  • Cut (2) 3" x 13.5" strips. Label D
  • Cut (2) 3" x 18.5" strips. Label E

B. Pillow Top [Block] Assembly

1. Sew (1) 2" x 10.5" strip B to left and right side of 10.5" x 10.5" square. Press towards strip B.
A Bit of Scrap Stuff Blog #ABitofScrapStuffBlog #FreeTutorial #Pillow #QuiltedPillow #RileyBlakeDesigns #SandyGervais


2. Sew (1) 2" x 13.5" strip C to top and bottom. Press towards strip C.
A Bit of Scrap Stuff Blog #ABitofScrapStuffBlog #FreeTutorial #Pillow #QuiltedPillow #RileyBlakeDesigns #SandyGervais

3. Sew (1) 3" x 13.5" strip D to right and left of inner border. Press towards strip D.
A Bit of Scrap Stuff Blog #ABitofScrapStuffBlog #FreeTutorial #Pillow #QuiltedPillow #RileyBlakeDesigns #SandyGervais

4. Sew (1) 3" x 18.5" strip E to top and bottom of inner border. Press towards strip E. Oh Happy Day Block/Pillow top measures 18.5" x 18.5"
A Bit of Scrap Stuff Blog #ABitofScrapStuffBlog #FreeTutorial #Pillow #QuiltedPillow #RileyBlakeDesigns #SandyGervais

C. Make Quilt Sandwich:
  • Pillow Top (right side up), batting (middle), 22" x 22" backing fabric (right side down) *Backing fabric will be hidden inside pillow.
D. Quilt as desired:
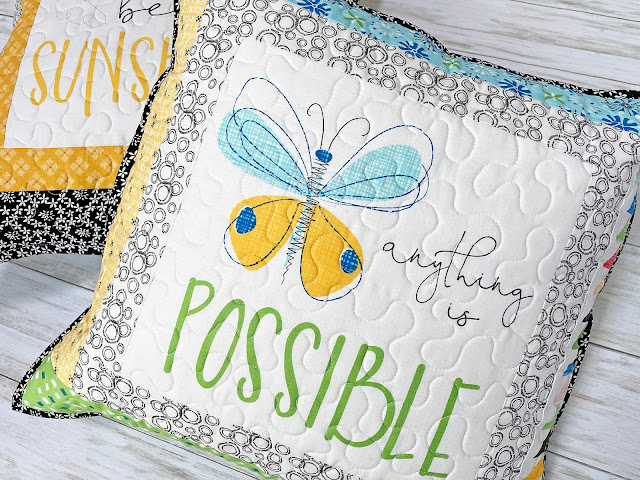
I chose to free motion stipple my pillow.
A Bit of Scrap Stuff Blog #ABitofScrapStuffBlog #FreeTutorial #Pillow #QuiltedPillow #RileyBlakeDesigns #SandyGervais

E. Make Pillow backing with your favorite technique. 
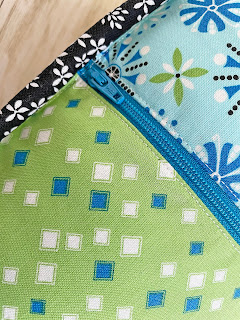
Sneak Peek. I will be sharing a tutorial soon on how to make an exposed zippered pillow backing.
A Bit of Scrap Stuff Blog #ABitofScrapStuffBlog #FreeTutorial #Pillow #QuiltedPillow #RileyBlakeDesigns #SandyGervaisA Bit of Scrap Stuff Blog #ABitofScrapStuffBlog #FreeTutorial #Pillow #QuiltedPillow #RileyBlakeDesigns #SandyGervais


F. Sew Together
Place quilted pillow top (right side up) on top of pillow backing (right side down). Sew together with a 1/8" seam allowance

G. Attach Binding with preferred method. 
Sneak Peek: I will be sharing a tutorial on machine binding.
A Bit of Scrap Stuff Blog #ABitofScrapStuffBlog #FreeTutorial #Pillow #QuiltedPillow #RileyBlakeDesigns #SandyGervaisA Bit of Scrap Stuff Blog #ABitofScrapStuffBlog #FreeTutorial #Pillow #QuiltedPillow #RileyBlakeDesigns #SandyGervais


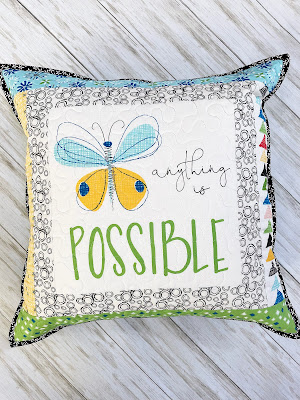
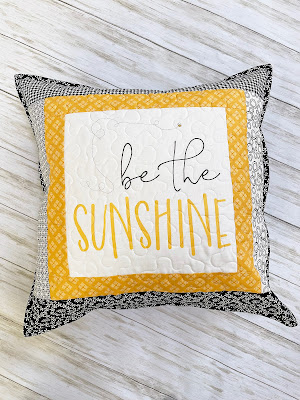
Your Oh Happy Day Pillow is now finished! I made a second pillow as I love having a pair of matching pillows!

A Bit of Scrap Stuff Blog #ABitofScrapStuffBlog #FreeTutorial #Pillow #QuiltedPillow #RileyBlakeDesigns #SandyGervaisA Bit of Scrap Stuff Blog #ABitofScrapStuffBlog #FreeTutorial #Pillow #QuiltedPillow #RileyBlakeDesigns #SandyGervais

If you prefer mini quilts or table toppers - this project will work too! Just omit adding the pillow backing step E. 

A Bit of Scrap Stuff Blog #ABitofScrapStuffBlog #FreeTutorial #Pillow #QuiltedPillow #RileyBlakeDesigns #SandyGervais

I absolutely love these sweet pillows and the happiness they bring my home! 

Be sure to check back soon for tutorials on Making an Exposed Zipper Pillow Backing and Machine Binding.

A Bit of Scrap Stuff Blog #ABitofScrapStuffBlog #FreeTutorial #Pillow #QuiltedPillow #RileyBlakeDesigns #SandyGervais


Oh Happy Day will be shipping to your favorite quilt shop soon! 


Be sure to follow me on Instagram @ABitofScrapStuff  and here on my A Bit of Scrap Stuff Blog for more fabric fun!

Have a great day and happy quilting! 

Melanie

Fat Quarter Shop Quilting Fabrics and Supplies


This post contains affiliate links. Thank you for supporting A Bit of Scrap Stuff. My family appreciates it!


Monday, November 2, 2020

Tip Top Quilt - From the Heart

A Bit of Scrap Stuff Blog #ABitofScrapStuff #TipTopQuilt #ABitofScrapStuffPattern #RileyBlakeDesigns #Quilt

Hello! Today I'm sharing my newest quilt - Tip Top Quilt (pattern here) with the From the Heart Collection designed by Sandy Gervais for Riley Blake Designs. PLUS the collection has an amazing panel so I made the the quilt reversible!!! Here's a peek at the From the Heart Collection.


I really love the red and white prints!!! Making two-tone quilts is so fun!!! I chose to add a touch of pink for the sashing of my Tip Top Quilt so the red and white prints stand out!

A Bit of Scrap Stuff Blog #ABitofScrapStuff #TipTopQuilt #ABitofScrapStuffPattern #RileyBlakeDesigns #Quilt

I really love making the Tip Top Quilt (pattern here)! It's a favorite of mine as it uses (36) 2.5" strips and 1 yard background fabric PLUS makes a lap size quilt 56.5" x 56.5". The blocks are fun to make as it's totally 
scrappy and only has the one center seam to match in the entire block.

A Bit of Scrap Stuff Blog #ABitofScrapStuff #TipTopQuilt #ABitofScrapStuffPattern #RileyBlakeDesigns #Quilt

Supplies for Tip Top Quilt - From the Heart 56.5" x 56.5"

A Bit of Scrap Stuff Blog #ABitofScrapStuff #TipTopQuilt #ABitofScrapStuffPattern #RileyBlakeDesigns #Quilt

I used the tiny floral blossom print for the binding and LOVE it!!! I think this might be my favorite print!
A Bit of Scrap Stuff Blog #ABitofScrapStuff #TipTopQuilt #ABitofScrapStuffPattern #RileyBlakeDesigns #Quilt

Ready to see the reverse side of the quilt...I LOVE it!

A Bit of Scrap Stuff Blog #ABitofScrapStuff #TipTopQuilt #ABitofScrapStuffPattern #RileyBlakeDesigns #Quilt


I just love the 
illustrations!!! Here's a close up.

A Bit of Scrap Stuff Blog #ABitofScrapStuff #TipTopQuilt #ABitofScrapStuffPattern #RileyBlakeDesigns #Quilt

Cutting instructions that I used to create From the Heart Panel side of my quilt - Be sure to measure your quilt each step BEFORE cutting your borders as yours may vary slightly. CUT to the length of your quilt.
  • Panel: Cut  35" x 43.5"
  • Inner Border: Cut (2) 2.5" x 43.5" strips (sew to right and left side of panel) and (2) 2.5" x 39" strips (sew to top and bottom of panel)
  • Outer Border: Cut (3) 10.5" x WOF strips - sew together - sub cut (2) 10.5" x 47" strips (sew to right and left and side of inner border). Cut (3) 6.5" x WOF strips - sew together - sub cut (2) 6.5" x 59.5". 
  • From the Heart Panel Quilt measures 59.5" x 59.5". If you are sending your quilt to a long arm quilter - you will need to cut your outer border strips wider to allow for  extra backing required by long arm quilters.
A Bit of Scrap Stuff Blog #ABitofScrapStuff #TipTopQuilt #ABitofScrapStuffPattern #RileyBlakeDesigns #Quilt

From the Heart Collection will be shipping to stores November 2020. It's perfect for Valentine's Day or anytime of the year as we all need more LOVE! Fabric available HERE.

Tip Top Quilt Pattern available - Etsy (HERE) or PayHip (HERE)

If you are making the Tip Top Quilt with yardage ... you can easily cut your own 2.5" strips with an AccuQuilt Cutting Machine and AccuQuilt GO! 2.5" strip die OR the Creative Grids Stripology Ruler and rotary cutter.

A Bit of Scrap Stuff Blog #ABitofScrapStuff #TipTopQuilt #ABitofScrapStuffPattern #RileyBlakeDesigns #Quilt


Be sure to follow me on Instagram @ABitofScrapStuff  and here on my A Bit of Scrap Stuff Blog for more fabric fun!

Have a great day and happy quilting! 

Melanie


Fat Quarter Shop Quilting Fabrics and Supplies

This post contains affiliate links. Thank you for supporting A Bit of Scrap Stuff. My family appreciates it!