Monday, October 24, 2022

Timber Quilt - Forgotten Memories


Forgotten Memories - Timber Quilt


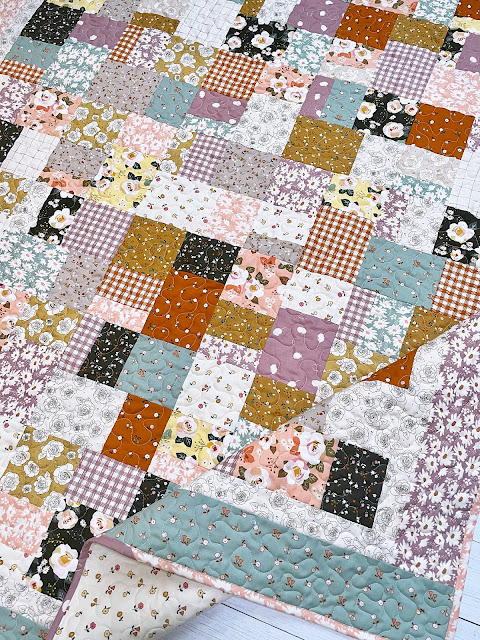
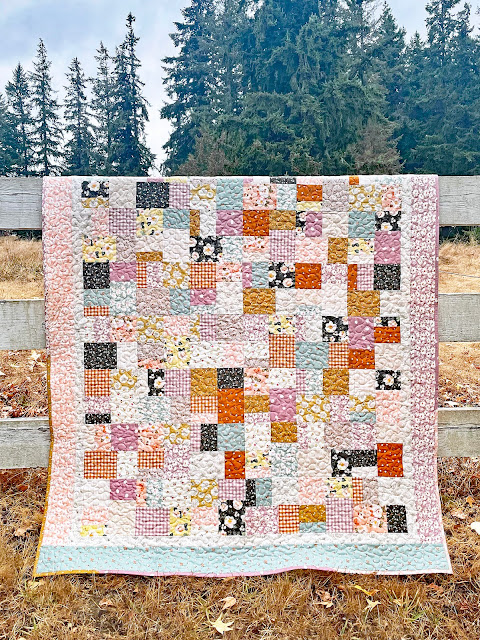
Hi Quilty Friends! Today I'm sharing the Timber Quilt featuring the beautiful Forgotten Memories fabric collection designed my Minki Kim for Riley Blake Designs


Shop Fabric at Fat Quarter Shop
The color palette of the Forgotten Memories collection is absolutely gorgeous and so perfect for fall! I love how well the prints and colors coordinate so I wanted to create a quilt with no background fabric. My Timber Quilt Pattern was perfect for a new fall quilt. 


The Timber Quilt pattern is a beginner friendly pattern that focuses on the prints from the Forgotten Memories collection as no background fabric is needed for this quilt! All you need is (42) 10" squares plus border fabric! Of course, you could always skip the border fabric and just use (1) 10" Stacker for a slightly smaller quilt!


Timber Quilt  uses all (42) 10" squares in a 10" Stacker. As the Timber Quilt is block based, you can easily adjust the size of your quilt by making more or less blocks. Each Timber block requires one 10" x 10" square. 

Accuquilt Dynamic Promo


I chose to add a scrappy outer border for my Timber Quilt and I LOVE it! This is a really easy pattern substitute as you just choose (4) 1/4 yard cuts instead of (1) yard cut! Plus this allows you to use 4 of your favorite prints instead of just 1!


Timber Quilt Pattern - Etsy or Payhip Pattern Shop


Be sure to follow me on Instagram @ABitofScrapStuff and on my A Bit of Scrap Stuff Blog for more fabric fun!

Have a great day and happy sewing / quilting! 


Melanie 

Shop Fabric at Fat Quarter Shop


This post contains affiliate links. Thank you for supporting A Bit of Scrap Stuff. My family appreciates it!

Thursday, October 13, 2022

Bee Ginghams: Sixty-Four Quilt

A Bit of Scrap Stuff Blog #ABitofScrapStuff #BeeGinghamsFabric #RileyBlakeDesigns #LoriHolt #Quilt

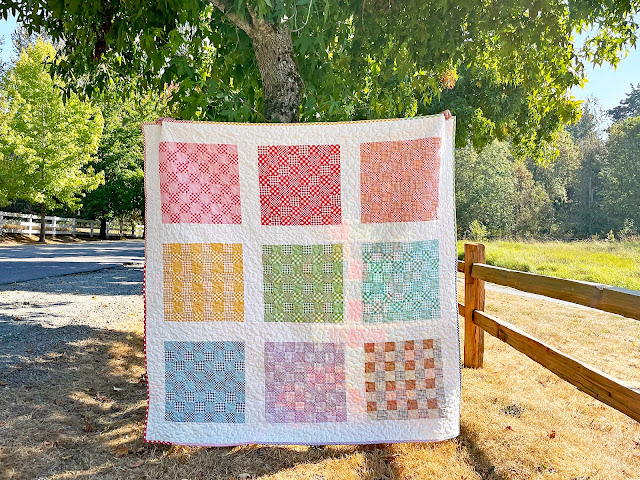
Hi Quilty Friends and Lori Holt fans! Today I'm sharing the Sixty-Four Quilt I made with the fabulous new Lori Holt Basic - Bee Ginghams!!!!  


Shop Fabric at Fat Quarter Shop

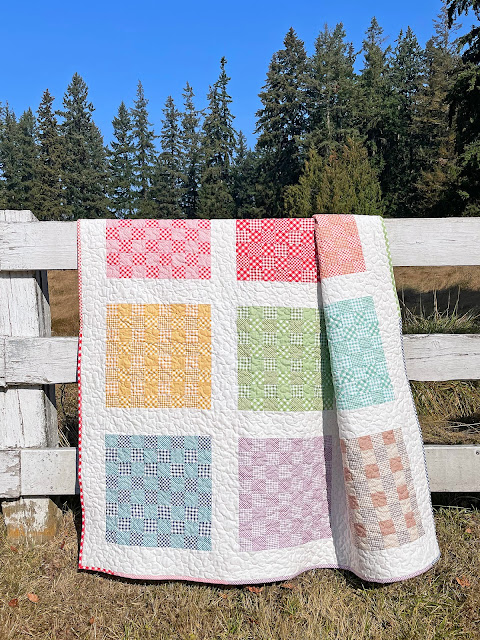
Just look at all the lovely ginghams! The colors and variety of ginghams are absolutely perfect! Plus three ginghams are named Melanie too! 

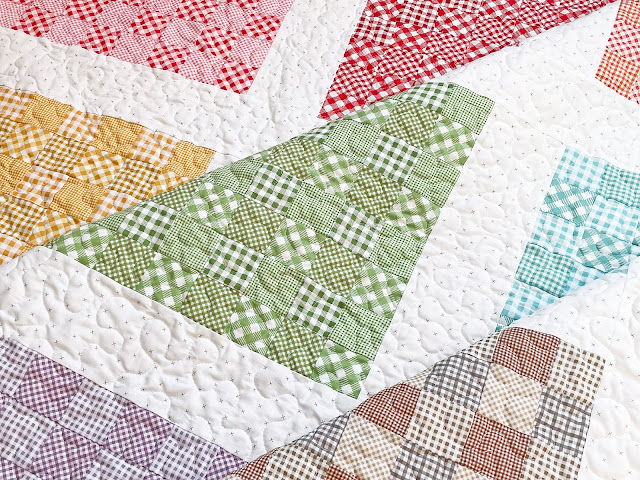
I kept admiring the happy ginghams while I planned which quilt to make from Lori Holt's new book: Scrappiness is Happiness. I chose the Sixty-Four Quilt because I was able to make 9 Gingham Blocks using almost all of the Bee Ginghams in the collection!

A Bit of Scrap Stuff Blog #ABitofScrapStuff #BeeGinghamsFabric #RileyBlakeDesigns #LoriHolt #Quilt

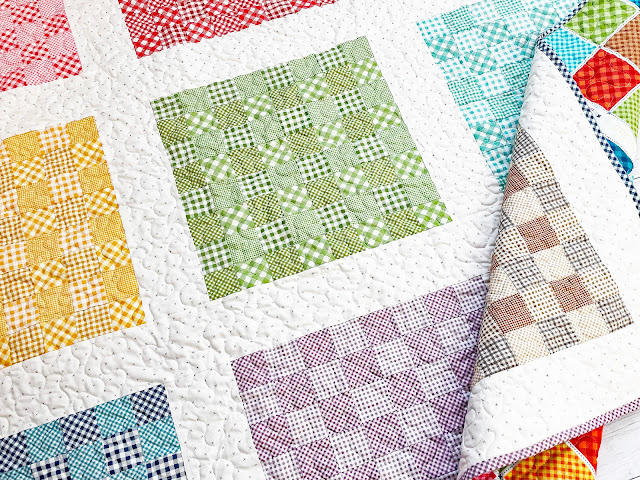
To make the Bee Ginghams: Sixty-Four Quilt, I decided to create one color way per block. Each block varies in the number of ginghams ... some blocks have two or three or four gingham prints each. I then organized each individual 2.5" square into different patterns based on the number of gingham prints in each block. I love the variety this gave my quilt!

A Bit of Scrap Stuff Blog #ABitofScrapStuff #BeeGinghamsFabric #RileyBlakeDesigns #LoriHolt #Quilt

Accuquilt Dynamic Promo

I'm sure you also want to make your own Bee Ginghams: Sixty-Four Quilt so let's chat about supplies...

Bee Ginghams: Sixty-Four Quilt 64.5" x 64.5"

Supplies:

A Bit of Scrap Stuff Blog #ABitofScrapStuff #BeeGinghamsFabric #RileyBlakeDesigns #LoriHolt #Quilt

The Sixty-Four Quilt has fun quilty math. Each Sixty-Four Block contains 64 squares and the finished quilt is a 64" square ! 

A Bit of Scrap Stuff Blog #ABitofScrapStuff #BeeGinghamsFabric #RileyBlakeDesigns #LoriHolt #Quilt

I used the most perfect backing fabric from Lori Holt Bee Basics Busy Patchwork Multi! I even included the sweet sentiments print on the fabric edge when I pieced my backing fabric together.

A Bit of Scrap Stuff Blog #ABitofScrapStuff #BeeGinghamsFabric #RileyBlakeDesigns #LoriHolt #Quilt

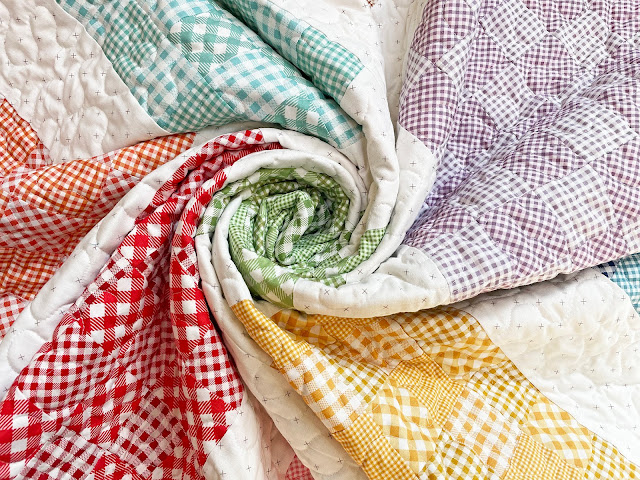
This quilt is so perfect for a swirl ... loooooove it!

A Bit of Scrap Stuff Blog #ABitofScrapStuff #BeeGinghamsFabric #RileyBlakeDesigns #LoriHolt #Quilt

Do you have a favorite Bee Gingham color or gingham print???? I really love all the happy colors together!

A Bit of Scrap Stuff Blog #ABitofScrapStuff #BeeGinghamsFabric #RileyBlakeDesigns #LoriHolt #Quilt

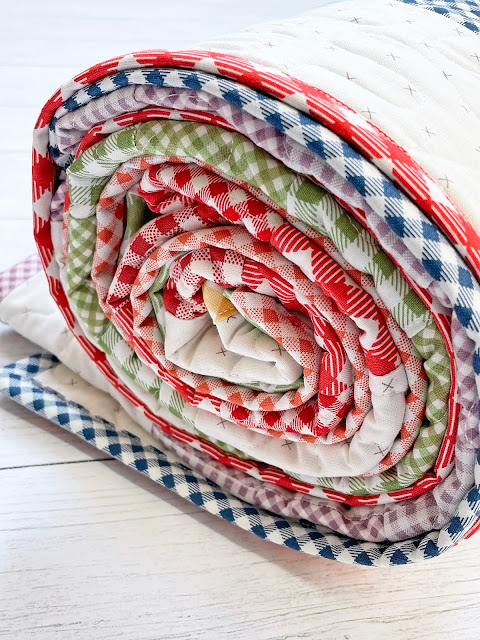
I think scrappy binding was a must for this quilt! I just couldn't decide on one color.

A Bit of Scrap Stuff Blog #ABitofScrapStuff #BeeGinghamsFabric #RileyBlakeDesigns #LoriHolt #Quilt

Scrappiness is Happiness Book available HERE

A Bit of Scrap Stuff Blog #ABitofScrapStuff #BeeGinghamsFabric #RileyBlakeDesigns #LoriHolt #Quilt

Be sure to follow me on Instagram @ABitofScrapStuff and on my A Bit of Scrap Stuff Blog for more fabric fun!

Have a great day and happy sewing / quilting! 


Melanie 

Shop Fabric at Fat Quarter Shop


This post contains affiliate links. Thank you for supporting A Bit of Scrap Stuff. My family appreciates it!


Wednesday, October 12, 2022

TUTORIAL: Spooky Fun - Circle Appliqué Pillow

Hello! Today I'm sharing a tutorial for a Spooky Fun - Circle Appliqué Pillow! This is a quick and fun home decor project that is easily completed in an afternoon or evening! I selected Halloween fabric as it is Spooky Season, but you can easily use any fabric that fits your home decor!

I created an appliqué project because I recently received the Janome Appliqué Foot (AP) and wanted to use it immediately. Yes - I love this (new to me) foot as my appliqué stitches look so fabulous and even! I recently learned about the Janome Appliqué Foot (AP) when I was watching the Janome Skill Builder Series Week 6 Video on YouTube - here . The video is full of helpful appliqué tips!


Spooky Fun - Circle Appliqué Pillow (17.5" x 17.5")


Tutorial Time -  

Supplies:


Step 1: Adhere fusible adhesive (Heat 'N Bond Lite) to wrong size of fabric scraps. Be sure to sure to use a fusible adhesive that is safe for sewing as you will be appliqué stitching on the circles.

Step 2 (AccuQuilt Method): Cut desired number of circles using AccuQuilt GO! Circle 2", 3", 5" die. I prefer to remove the fusible adhesive paper backing prior to cutting the circles and only cut 2 layers at a time (Right side of fabrics touching)

Accuquilt Dynamic Promo

OR

Step 2: Trace circles with pen/pencil on paper side of Fusible Adhesive. You can use cups or bowls as a template or a compass. My circles are cut at 2" or 3" or 5", but you can use any size! Using scissors, cut along drawn circle line. Remove paper backing

Step 3: Place circles in desired layout on Pillow Front Fabric 18" x 18". I chose to have a few circles off the edge of the fabric for variety. Remember there will be a 1/4" seam along all edges of pillow.


Peek of the partial circles on the finished pillow.


Step 4: Iron/fuse circles in desired layout on Pillow Front Fabric 18" x 18.

Step 5: Using Janome Appliqué Foot (AP), appliqué along edge of circles. My preferred settings:


Appliqué  hint: 

Photo 1: Correct Needle Position. If you need to pivot/raise up presser foot to rotate fabric while using an Appliqué Stitch, the needle should be on the outside of the appliqué shape/circle.

Photo 2: Incorrect Needle Position. Do NOT pivot/raise pressure foot when needle is inside appliqué shape/circle. This will create an odd stitch and not a consistent appliqué stitch. Keep foot down and take another stitch until needle position is on outside of appliqué shape/circle as shown above.

Step 6: Optional Quilting. I chose to free motion meander around the Appliqué Circle Shapes.


Step 7: Finish pillow with preferred method. 
I love to use a Zipper to finish my pillows as it looks  clean and professional plus it is easy to remove the pillow cover for washing or changing of seasonal decor. 


I have two free tutorial methods on Zipper Installation for Pillows.

Spooky Fun - Circle Appliqué Pillow (front and back)


Are you going to use Seasonal Fabric or Everyday Fabric for your Circle Appliqué Pillow?

Be sure to follow me on Instagram @ABitofScrapStuff and on my A Bit of Scrap Stuff Blog for more fabric fun!

Have a great day and happy sewing / quilting! 


Melanie 

Shop Fabric at Fat Quarter Shop


This post contains affiliate links. Thank you for supporting A Bit of Scrap Stuff. My family appreciates it!

Tuesday, October 11, 2022

Christmastime Mystery Quilt Along - it's finished

A Bit of Scrap Stuff Blog #ABitofScrapStuff #ChristmastimeSAL #ChristmastimeQAL #FatQuarterShop #ChristmasQuilt


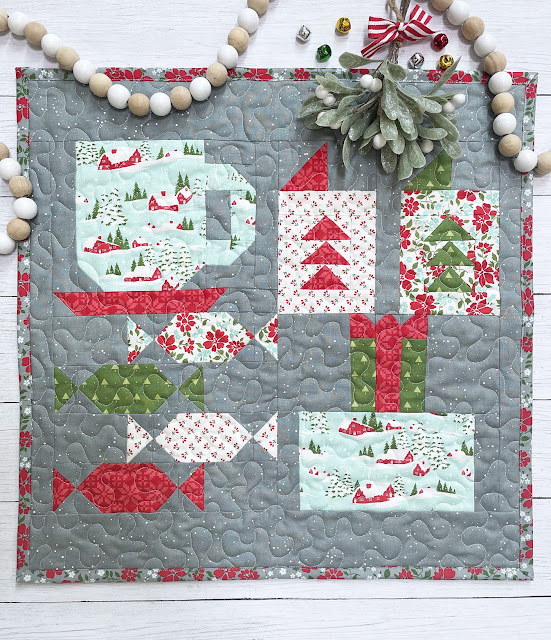
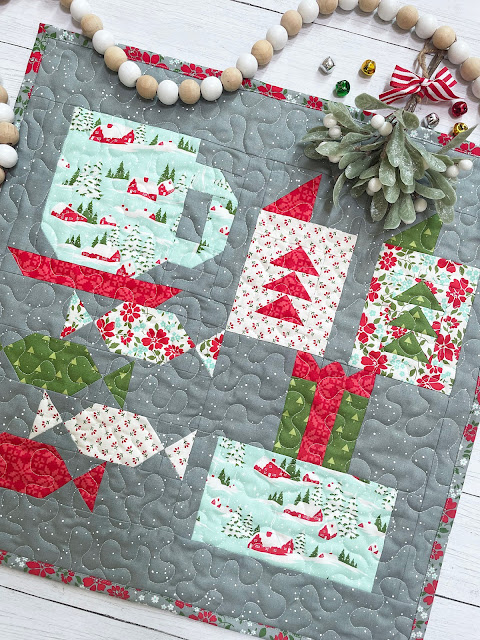
Hi Quilting and Stitching Friends! Today I'm sharing my finished  Christmastime Mystery Quilt with Fat Quarter Shop!  

I absolutely loved sewing a mystery block each week!  All of the  FREE Christmastime patterns designed by Fat Quarter Shop are available now! So you can easily have this fun project completed before the holidays!

Christmastime Mini Quilt / Pillow 20" x 20"

A Bit of Scrap Stuff Blog #ABitofScrapStuff #ChristmastimeSAL #ChristmastimeQAL #FatQuarterShop #ChristmasQuilt

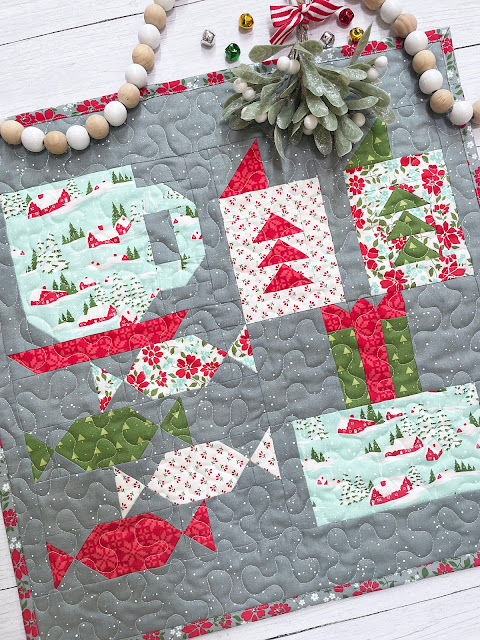
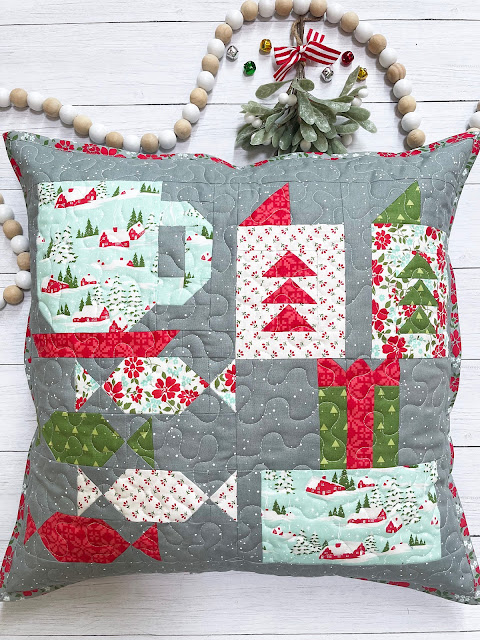
My Christmastime Quilt is a bit different from the pattern because I wanted to make mine a bit smaller and square so it could be a Mini Quilt or a Pillow! This is an easy change ... keep on reading for details.

A Bit of Scrap Stuff Blog #ABitofScrapStuff #ChristmastimeSAL #ChristmastimeQAL #FatQuarterShop #ChristmasQuilt

My Supplies: 
available at Fat Quarter Shop - links below


Shop Fabric at Fat Quarter Shop

Christmastime Mini Quilt / Pillow Version:

To create the smaller 20" x 20" finished size - I made a few easy changes!

A Bit of Scrap Stuff Blog #ABitofScrapStuff #ChristmastimeSAL #ChristmastimeQAL #FatQuarterShop #ChristmasQuilt

Block Changes:
  • Holiday Greetings Block- Only make two cards. Block will measure 7.5" x 9.5"
  • Wrapped with Cheer Block -  Make top gift and partial middle gift. Block will measure 8.5" x 9.5"

A Bit of Scrap Stuff Blog #ABitofScrapStuff #ChristmastimeSAL #ChristmastimeQAL #FatQuarterShop #ChristmasQuilt

Assembly

  • No sashing is required between blocks
  • Row 1: Cup of Cheer Block and Holiday Greetings Block  
  • Row 2: Hard Candies Block and Wrapped with Cheer Block
  • Cut (2) 1.5" x 15.5" side borders (right and left)
  • Cut (2) 3" x 20.5" top and bottom borders
A Bit of Scrap Stuff Blog #ABitofScrapStuff #ChristmastimeSAL #ChristmastimeQAL #FatQuarterShop #ChristmasQuilt


Add a zipper

A Bit of Scrap Stuff Blog #ABitofScrapStuff #ChristmastimeSAL #ChristmastimeQAL #FatQuarterShop #ChristmasQuilt

A Bit of Scrap Stuff Blog #ABitofScrapStuff #ChristmastimeSAL #ChristmastimeQAL #FatQuarterShop #ChristmasQuilt

I just love this Christmastime Pillow! It's perfect for a bit of seasonal decor in my home. Plus my family loves pillows. I like them to be "decoration only" compared to my kids who like to actually use them as pillows. Another benefit for a zippered backing so I can easily wash the cover ;).


Plus if I need a smaller table topper ... I can just remove the pillow insert!

A Bit of Scrap Stuff Blog #ABitofScrapStuff #ChristmastimeSAL #ChristmastimeQAL #FatQuarterShop #ChristmasQuilt


Accuquilt Dynamic Promo


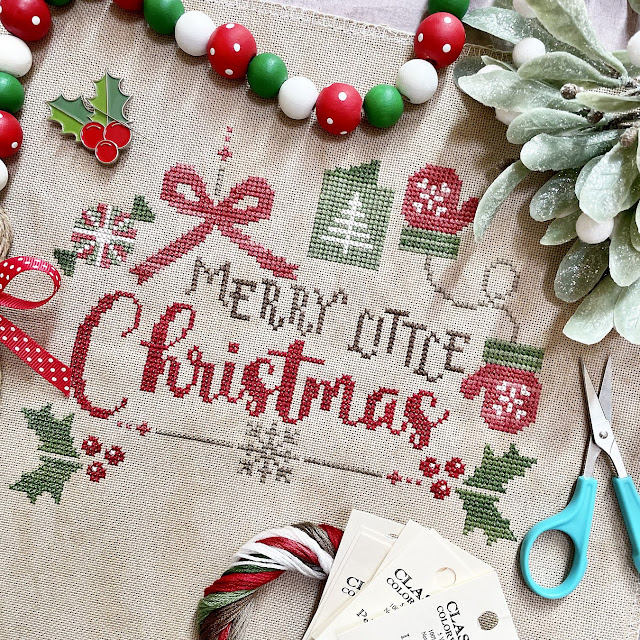
Christmastime Cross Stitch - release 4

A Bit of Scrap Stuff Blog #ABitofScrapStuff #ChristmastimeSAL #ChristmastimeQAL #FatQuarterShop #ChristmasQuilt

I love the Christmastime Stitch sooooo much! It's going to be a favorite of mine! Just one more section to stitch and then I will have it completed! I'm hoping to have it finished before Christmas!


A Bit of Scrap Stuff Blog #ABitofScrapStuff #ChristmastimeSAL #ChristmastimeQAL #FatQuarterShop #ChristmasQuiltA Bit of Scrap Stuff Blog #ABitofScrapStuff #ChristmastimeSAL #ChristmastimeQAL #FatQuarterShop #ChristmasQuilt


Be sure to follow me on Instagram @ABitofScrapStuff and on my A Bit of Scrap Stuff Blog for more fabric fun!

Have a great day and happy quilting and stitching! 


Melanie 

Shop Fabric at Fat Quarter Shop


This post contains affiliate links. Thank you for supporting A Bit of Scrap Stuff. My family appreciates it!