Saturday, May 30, 2020

Sew Sampler Box - May

Hello! I'm sew excited to share the May Sew Sampler Box from Fat Quarter Shop! May's theme is Buds &Bloom!!! This month, Sew Sampler Members received the latest fabric collection, Bloomington by Lella Boutique plus an exclusive pattern for the Rose Garden Quilt! 

Fat Quarter Shop Quilting Fabrics and Supplies

Let's chat more about my favorite aqua box of quilty goodies that I receive each month!

May Sew Sampler Box-click on links to below to purchase products at Fat Quarter Shop


Bloomington Petite Layer Cake and Rose Garden Quilt Pattern


I'm always a huge fan of Lella Boutique's fabric collections, so I was so excited to receive Bloomington!!! The member exclusive Rose Garden Quilt pattern shows off the lovely fabric so well! It's is added to my "must make" quilt list! 

Fat Quarter Shop has the Rose Garden Quilt finishing kit available (HERE)


Sweet Snips Fabric Scissors, Magic Touch Quilting Gloves, and Aurifil Thread


Sweet Snips Fabric Scissors: I always love new sewing scissors and these snips are AQUA ...love! They are the perfect size to place near my sewing machine to cut fabric or thread. I love that they are light weight, but sturdy and fit my hand perfectly! 

Magic Touch Quilting Gloves: I machine quilt all my projects on my home sewing machine (Janome M7) and quilting gloves are a must for me! I love the grippy fingers as it makes controlling my free motion quilting so much easier! This is a "must have" supply for any home machine quilter!

Aurifil thread: 50wt Aurifil thread is my "go to" piecing and quilting thread. I LOVE it! If I try to use a different brand - I notice right away (not in a good way). I love that Aurifil thread doesn't break, low lint, and perfect tension with my sewing machine.


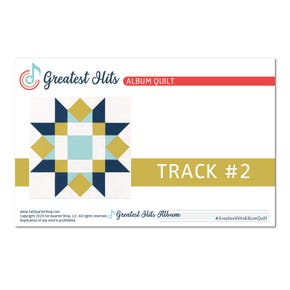
Each month, Sew Sampler Members receive a block pattern for the current Sew Sampler Mystery Quilt. This year- Greatest Hits Album features Moda Bella Solids and will be a large 70.5" x 90.5" sampler quilt! You can find Track #2 (pattern), Quilt Kit, and Thread Set available at Fat Quarter Shop! Purchase the Quilt Kit and you will be ready each month to sew your Greatest Hits block! I'm still thinking if I want to make my quilt with the Moda Bella Solids OR a different collection OR scrappy from my stash.

Join the Sew Sampler Box Membership 


Don't forget to sign up for the Sew Sampler Box wait list (here) * - each box is a wonderful surprise plus an awesome value! 

*The Sew Sampler Box Membership is full, but don't worry - you can sign up for the waitlist AND most of the items in this month's box are available at Fat Quarter Shop - links above.

Be sure to follow me on Instagram @ABitofScrapStuff  and here on my A Bit of Scrap Stuff Blog for more fabric fun!

Have a great day and happy sewing! 

Melanie

Fat Quarter Shop Quilting Fabrics and Supplies

This post contains affiliate links. Thank you for supporting A Bit of Scrap Stuff. My family appreciates it!


Wednesday, May 27, 2020

Pressing Matters


Hi Quilty friends...today I'm going to talk about a "pressing matter" ;). I'm often asked how I make my seams and points match... my secret....PRESSING and PINS. 

Let's chat how I use my favorite pressing tools! Recently Riley Blake Designs sent me the Riley Blake Designs Misting Bottle and Quilter's Clapper...they are AMAZING! I'm not sure why I wasn't using them before?!?!


Riley Blake Designs Misting Spray Bottle:  
(available here)
This Riley Blake Notions Misting Spray Bottle is perfect for liquid starch or water and for pressing beautiful seams. Airless and non-pressurized, it will spray continuously without leaking or dripping....seriously amazing! 10-ounce capacity. 

I don't like using water in my iron so the RBD Misting Spray Bottle is perfect for me. I simply spray my fabric with my misting bottle filled with water and then PRESS. 

You can also use liquid starch in your RBD Misting Spray Bottle if you like a stiffer fabric. Having (2) RBD Misting Bottles would be ideal - (1) for Water and (1) for Starch. Just use the cute RBD Washi Tape to mark the bottles. Actually, I might need a third one as my kids love to spray themselves with the water mist and it's almost summer ;).


Riley Blake Designs Quilter's Clapper: 

This Riley Blake Notions 7" Quilters Clapper is made of hardwood and is a classic tool used with a steam iron to set a seam. Made in the USA. RBD also makes a 12" version called the Tailor's Clapper.

Who knew this little piece of wood make my seams sooooo flat?!?!? After I spray my fabric with the RBD misting bottle, PRESS with iron, then I place the RBD Quilter's Clapper over my seam while it's hot. After the block is cool, remove the RBD Quilter's Clapper and your seam will be so flat!!! Perfect for bulky seams, half square triangles, or any seam you want flat! 


I used the RBD Misting Bottle and RBD Quilter's Clapper when I made my Starlight Double Pillow and my seams and points were perfect!


Starlight Double Abbie's Garden Pillow 16" x 16"
Supplies: (click on links below)


I also use a Wool Pressing Mat that I purchased from Amazon (here) or Gypsy Quilter (here) and the Oliso Pro Quilter's Iron (here). I totally love how my RBD Misting Spray Bottle matches my iron!


Taking the time to press your quilt blocks will make a huge difference in your final project! Plus sewing/quilting will be much more relaxing with flat seams!


Here's a peek of all the Abbie's Garden Mini Quilts/Pillows ....go ahead and zoom in on my points ;). Read more about my Abbie's Garden Projects in THIS blog post HERE.


Have you tried the RBD Misting Spray Bottle or RBD Quilter's Clapper? Do you love them too????


Be sure to follow me on Instagram @ABitofScrapStuff  and here on my A Bit of Scrap Stuff Blog for more fabric fun!

Have a great day and happy quilting! 

Melanie

Fat Quarter Shop Quilting Fabrics and Supplies

This post contains affiliate links. Thank you for supporting A Bit of Scrap Stuff. My family appreciates it!

Friday, May 22, 2020

Abbie's Garden Quilt and Pillows


Hello! I've been busy quilting - yay! Quilting is my way of relaxing ... I love to create! What could be more relaxing than quilting with Abbie's Garden a new collection designed by Sue Daley and Gabrielle Neil for Riley Blake Designs. The illustrations are just too sweet! Plus so many fussy cutting opportunities. Be sure to read the full post as I included a mini tutorial for the quilt top PLUS I share photos of the pieced quilt back (it's reversible) and 3 pillows! I just couldn't stop sewing with this sweet collection!


For my Abbie's Garden Quilt, I used the Abbie's Garden Quilt Panel ....so my quilt looks like I fussy cut the little girl and paper pieced all the blocks. Instead- all I needed to sew was the borders - yay!!!  

Peek of the panel:


I really love using Riley Blake Panels as the fabric and print quality is fantastic! Quilt panels are a perfect way to create a quick weekend quilt! Abbie's Garden would be the sweetest quilt for baby shower or a little girl's birthday! Keep on reading to see the backside as it's a reversible quilt!


Abbie's Garden Quilt 48" x 54.5" 

Supplies:


Mini Tutorial - Quilt Top

1. Cut Abbie's Garden Quilt Panel to 36.5" x 43"

2. Inner border: *Measure your quilt top before cutting borders as your length may differ slightly
  • Cut (4) 2" x WOF strips 
  • Attach side borders with 1/4" seam
  • Attach top and bottom borders with 1/4" seam


3. Outer border: *Measure your quilt top before cutting borders as your length may differ slightly
  • Cut (5) 4.5" x WOF strips from outer border fabric
  • Cut (4) 4.5" x 4.5" squares from Abbie's Garden Block Panel
  • Measure quilt width. Sub-cut (2) 4.5" x width of quilt. This will be the top and bottom border.
  • Sew (1) 4.5" x 4.5" square to each end of top and bottom border. Set aside.
  • Sew remaining (3) 4.5" x WOF together and cut (2) pieces to quilt length. Attach side borders with 1/4" seam.
  • Attach top and bottom borders (with 4.5" x 4.5" squares on each end) with 1/4" seam


Now that the quilt top is done...it's time to see the backside - yay! Which I totally loooooove!


To create the pieced backing, I cut out some of my favorite prints from the Abbie's Garden Block Panel. Then I sewed the squares back together - ha! My squares were cut at (1) 18.5" x 18.5", (2) 12.5 " x 12.5", and (4) 6.5" x 6.5".


I just love making my quilts reversible!!!


There were a few prints left on the Abbie's Garden Block Panel...so I made (3) coordinating pillows!!!


Total cuteness!!! I just couldn't let any of this adorable fabric not be sewed!


Have Courage and Be Kind Pillow - 16"


I absolutely loved quilting with Abbie's Garden so much that I just kept creating until I ran out of fabric ;).

Abbie's Garden is shipping to your favorite quilt shop right now - yay!

What was your favorite Abbie's Garden Project?


Be sure to follow me on Instagram @ABitofScrapStuff  and here on my A Bit of Scrap Stuff Blog for more fabric fun!

Have a great day and happy quilting! 

Melanie

Fat Quarter Shop Quilting Fabrics and Supplies

This post contains affiliate links. Thank you for supporting A Bit of Scrap Stuff. My family appreciates it!

Monday, May 18, 2020

National Parks Quilt with Mini Tutorial


Today I'm excited share my new National Parks Quilt. PS -it's reversible!!! I used the brand new Riley Blake National Parks Wilderness Wonders Panel plus additional prints from the National Parks collection! I love this fabric ... the retro posters prints are awesome! Keep on reading for a mini-tutorial!


The new Riley Blake National Parks Wilderness Panel is 54" x 72". Since it is a large panel and I wanted to use the coordinating prints, I chose to add a border to the right and left sides only. 


I love sewing with Riley Blake Designs Panels as the quality is fantastic! The fabric feels so nice and the printing is excellent! Plus the National Parks Wilderness Wonders Panel could be a quilt by itself! Just add a backing and binding - done!

Let's chat about how I made my National Parks Quilt so you can make one too!


National Parks Quilt 66" x 72"
Supplies:

Mini Tutorial:
  1. Cut National Parks Wilderness Panel to 54.5" x 72.5"
  2. Piece (2) columns of (12) 6.5" x 6.5" squares.
  3. Sew (1) column to right and left side of the National Parks Wilderness Panel.
  4. Apply fusible adhesive to back side of fabrics scraps for appliqué shapes.
  5. Using your AccuQuilt GO! Cutting Machine with GO! Northwoods Medley die, cut (2) bears, (2) moose, and (4) trees.
  6. Fuse (1) bear, (1) moose, and (2) trees to 3 different squares on each right and left side of border.


Remember how I said it was reversible....well....I just had to use the coordinating National Parks Poster Panel USA Map. 


The National Parks Poster Panel USA Map - is so helpful for us geography challenged people ;). I know now how states have National Parks and where each one is located!


To make the pieced backing, I simply used the National Parks Patches fabric as borders around the panel. I love it!


I LOVE making double sided/reversible quilts! The trickiest part is making sure the front and back line up straight when I baste them together. 


I loved making this quilt and finding all the National Parks I have visited! It would be super fun to use a fabric marker to add the year when you visit each park - what an awesome memory!

The National Park Fabric Collection and Panels by Riley Blake Designs will be shipping to your favorite quilt shop soon!


Be sure to follow me on Instagram @ABitofScrapStuff  and here on my A Bit of Scrap Stuff Blog for more fabric fun!
Have a great day and happy quilting! 

Melanie

Fat Quarter Shop Quilting Fabrics and Supplies

This post contains affiliate links. Thank you for supporting A Bit of Scrap Stuff. My family appreciates it!