Thursday, March 16, 2017

Spellbound Quilt with Fat Quarter Shop and Simply Colorful II in Purple plus GIVEAWAY


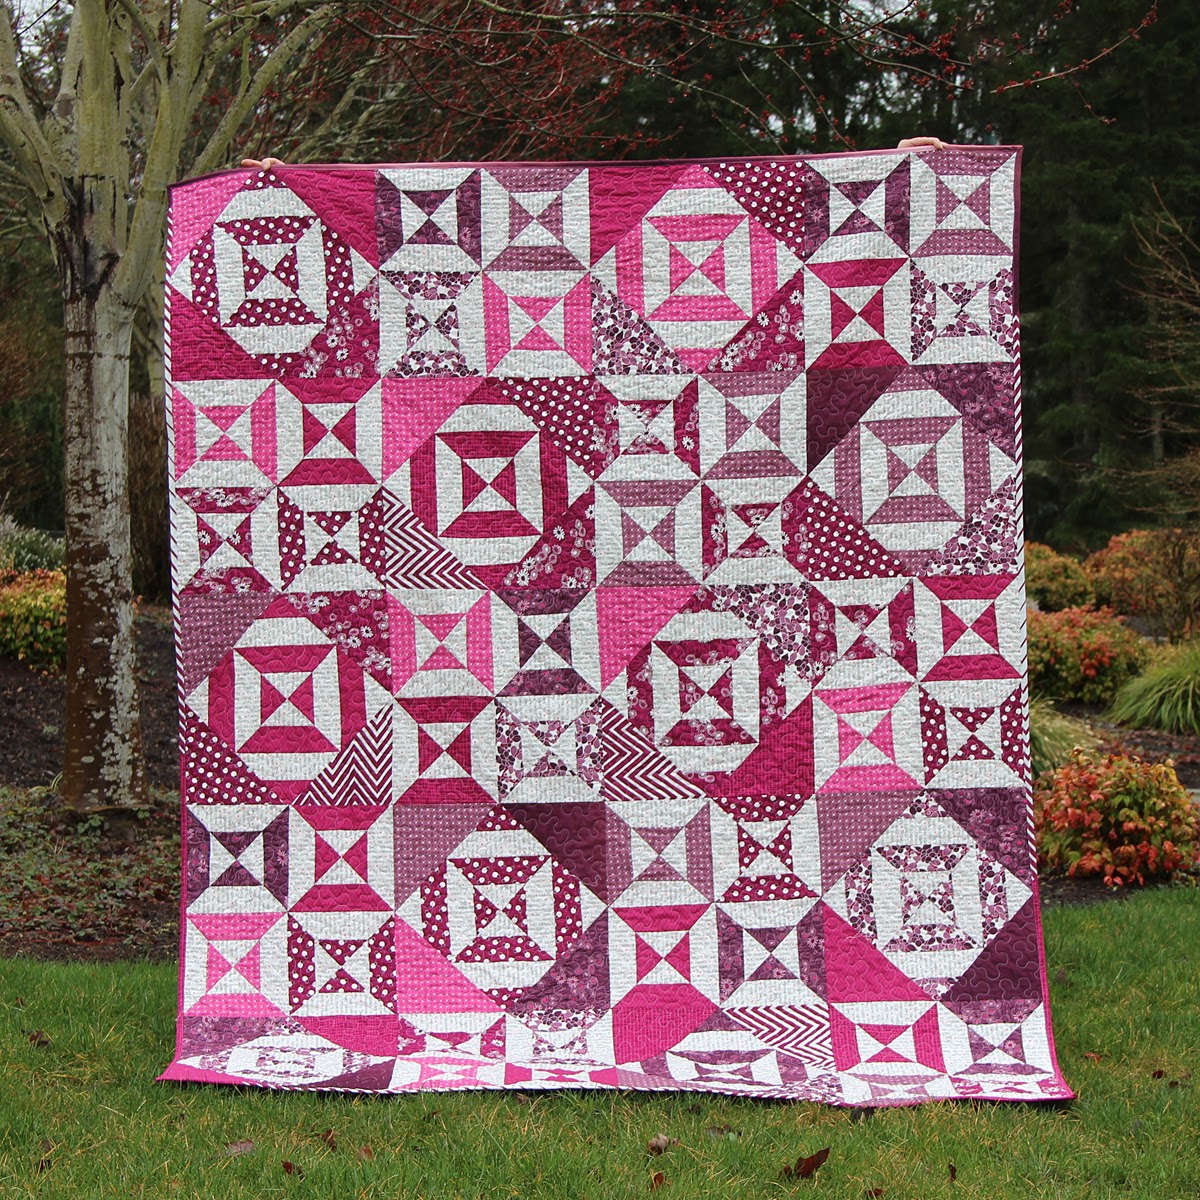
I am soooooo excited to share my Spellbound Quilt! I love this new Sew Emma Pattern at Fat Quarter Shop. It looks so tricky, but is actually quite easy to sew! I love the large size of this quilt- 64.5" x 80.5"....which is perfect! Plus it is purple....my favorite!!!

Shop Fabric at Fat Quarter Shop


I was so excited to find the most perfect purple fabric at Fat Quarter Shop for my Spellbound Quilt! I used 2 Simply Colorful II in purple jr jelly rolls (quilt top and binding), jr layer cake (instead of yardage), Spectrum Notes for my background (instead of white jelly roll). I love how well this fabric shows off this amazing pattern!

Simply Colorful II Fabric is out of stock, but no worries as Fat Quarter Shop has many fabulous fabric collections available! 

Are you ready to make your own????

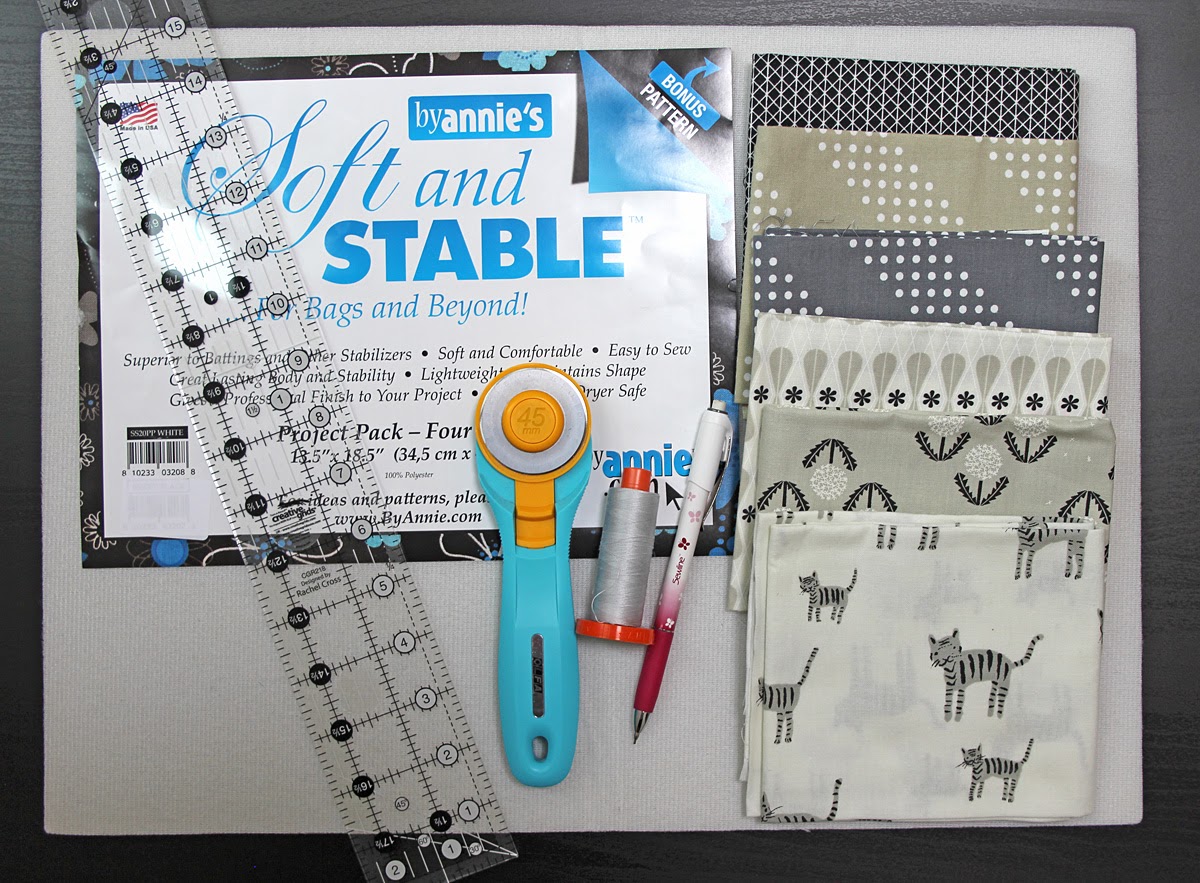
Spellbound Quilt Supplies

Shop Fabric at Fat Quarter Shop

Don't forget to follow me on Instagram @ABitofScrapStuff  (previously @mellierc) as Fat Quarter Shop is giving away one of my Instagram followers (2) Simply Colorful II jr jelly rolls in purple so you can make your own Spellbound Quilt!!! Watch for this image to post today on Instagram...then enter to win! Giveaway is now closed. 

Enter on Instagram @mellierc 

Thank you to Fat Quarter Shop for giving me a copy of the Spellbound Pattern and fabric so I could make my quilt. I loved sewing along with the Spellbound Quilt Along!

Be sure to follow me on Instagram @ABitofScrapStuff  (previously @mellierc) to see all of my sewing projects plus follow my Mostly Crafty Blog so you don't miss a post.

Plus...I could NOT stop taking photos of this quilt as I just love it! I couldn't pick a favorite...so here they all are :)


Have great day!

Melanie


Shop Fabric at Fat Quarter Shop


This post contains affiliate links. Thank you for supporting A Bit of Scrap Stuff. My family appreciates it!

Friday, March 10, 2017

Placemats with Fat Quarter Shop Sew Along with ByAnnie's Soft and Stable


Happy Friday! Today I'm sharing one of my placemats using ByAnnie's Soft and Stable Project Pack with her Free Pattern and Fat Quarter Shop. It was too funny as my husband was saying that maybe we needed some new placemats for our dining table after one really messy dinner (we have 3 kids :) ) AND the next day I received an email from Fat Quarter Shop asking if I wanted to join this Sew Along...it was perfect!

What I love about this pattern is that is you can make it match your home based on your fabric choices. We have a modern style home, but I snuck in these tiger cats for my daughter's placemat :). It is a nice and quick pattern as you quilt as you go!

Supplies:


You just need ByAnnie's Soft and Stable Project Pack (makes 4 placemats per pack), the FREE pattern included in pack, Fat Quarters or yardage, and sewing basics (rotary cutter, ruler, mat, Aurifil thread, and marking pencil/pen). I decided to use some neutral fabrics from my Cotton & Steel stash. I knew the neutrals would match our dining room well. 

Another fun sewing skill that you use is...using the backing fabric to bind your project! Yes...no separate binding fabric is needed.  I tried to snap a picture to show the finished self-binding method. Pretty snazzy and quick!


Ready to make your own???
Check out the Fat Quarter Shop Jolly Jabber Blog for more information...here
Plus Fat Quarter Shop made a video to help us out....here 
Soft and Stable White Project Pack ByAnnie...here

We are all set for dinner now. Don't worry...they are machine washable too!

Thank you to Fat Quarter Shop for sending me a ByAnnie's Soft and Stable Project Pack to sew my placemats. My family LOVES them (the boys didn't even mention the flowers ;) )!!!

Have a great weekend!!!

Be sure to follow me on Instagram @mellierc to see all of my sewing projects plus follow my Mostly Crafty Blog so you don't miss a post.

Melanie

Fruit Salad Pillow Mania with Fort Worth Fabric Friday Bundle Batch


I am super excited to share my Fruit Salad Pillow Mania Projects with the Fruit Salad Friday Bundle Batch with Fort Worth Fabric Studio.  

(In my best TV informercial voice) First I made the Shamrock pillow as I needed a March themed pillow for my couch :)...THEN I needed a Heart Pillow....Well I couldn't stop there because the bundle is called Fruit Salad so I got a bit crazy and mixed it all up into a Patchwork Pillow. Yes...I made all 3 pillows with backings with one FQ bundle (just a few scraps were left). Just look at the adorable bundle below...how could I not use up all the fabric????

There is usually one fabric that catches my eye and makes me need THAT bundle. This week it was  the Sweet Orchard Scallop Green Fabric  by Riley Blake...I just loved the tiny fruits on the scalloped doily. This bundle just makes me so happy! 

Are you ready to make your 3 Fruit Salad Mania Pillows??? 
Mini tutorial below.

Supplies:

1. Fruit Salad Fat Quarter Bundle
2. Double Fold Crochet Edge Bias Tape: Red Gingham Check by Vintage Door - 2 yards
3. 12" Lace Zippers (2)
4. 18" or larger zipper from stash
5. Scrap Batting
6. Pillow form 12"x 16" (2) and 18"x 18" (1) or 16"x16" pillow if you like a looser fit
7. Heat N Bond lite from stash
8. Template (approx 4" shamrock and hearts) -Click here

Shamrock Pillow 12"x 16"


1. Follow package directions for Heat N Bond. 
Make 3 Shamrocks (don't fuse to pillow front yet)
2. Cut (1) 13 x 17 pillow front background
3. Layer Pillow front on top, batting, optional fabric on bottom -will not be seen, but is easier to quilt (batting on bottom doesn't slide as easily when free motion quilting).
4. Quilt pillow top. I chose to free motion stippled loops. Then trim down to 12.5" x 16.5"
5. Position Shamrocks as desired and fuse
6. Stitch along edge of each Shamrock, if desired
7. Create Pillow Backing. I used the fabulous 12" Lace zippers for my pillow backing see below...

 8. Place wrong sides together and stitch 1/8" from edge around entire pillow. 

9 . Cut 2.5" binding strips and attach to pillow.

Heart Pillow 12" x 16"


Made exactly like Shamrock pillow except I used the adorable Double Fold Crochet Edge Bias Tape: Red Gingham Check by Vintage Door to finish my pillow and Hearts instead of Shamrocks :).

Don't you just love the Lace Zippers for the pillow backing...love love love them! They just add so much loveliness to the pillows! Grab them here. 


Patchwork Fruit Salad Pillow


I love being able to use up my ENTIRE bundle so I made this pillow based on how much fabric I had left :). This pillow finishes at 17" square....I used a 18"  pillow form as I like a full pillow!

1. Cut (49) 2.5" squares. I cut (7) 2.5" squares from 7 fabrics
2. Cut (4) 2" x 18" strips of border fabric. You will trim these to size
3. Sew the (49) 2.5" squares to together to make a 7 x 7 grid
4. Sew border strips to all 4 size and trim
5. Layer Pillow front on top, batting, optional fabric on bottom -will not be seen, but is easier to quilt (batting on bottom doesn't slide as easily when quilting).
6. Quilt pillow front as desired. I chose diagonal straight-line quilting 
7. Make pillow backing
8. Sew pillow together with favorite method

Time to love your 3 Fruit Salad pillows and be happy that you used almost the entire bundle!


Here is a bit of a close up of the fun notions that I used this week.

12 inch lace zippers! They are so lovely....I showed some of my local quilty friends these zippers and they went nuts! Fort Worth Fabric also has 8" too.  Click here to see all the sizes and colors available


I LOVE a gingham check bias binding plus this one has an adorable lace edge! I was so excited to be able to use this to bind my pillow! I need more as I think it will be perfect for finishing a dress for my daughter! Available here

Thank you again for reading my super LONG post today! I hope you decide to make some Fruit Salad Pillows too! Don't worry...if you aren't a pillow fan- you can always make them as mini quilts or table toppers.

Thank you again to Fort Worth Fabric Studio for having me create a project with this fabulous Fruit Salad Fat Quarter Bundle!!! Be sure to grab your bundle here. I would grab it quickly as last week's bundle sold out in a few hours! Tag your projects on social media with #sewingwithfwfabricstudio and @fwfabricstudio and me @mellierc

Have a great day !

Melanie


SaveSave

Monday, March 6, 2017

Morning Glory Sew Along with Fat Quarter Shop


I'm so excited to share my project with the Morning Glory Sew Along with Fat Quarter Shop. I used Pat Sloan's new collection: Sunday Drive and I just LOVE it! I decided to choose my favorite 4 fabrics and I love how well they work for the Morning Glory Pattern.


The Morning Glory Pattern gives multiple sizes and is easy to adjust the size. I decided to make a mini-quilt/pillow. When trying to decide how to sew the blocks for my pillow, I just lay paper over the pattern and move it about until I find a layout that I like. 


I didn't realize the corner blocks were a bit bigger until I sewed them together...oops. I needed to trim them down to 5" so my seams would match nicely. I used my new Creative Grids Striplology Squared Ruler and it was  SO EASY! This ruler is one of my new favorite notions and I'm so glad I bought it!! Click here to purchase at Fat Quarter Shop - plus video too. Just trim the block using the diagonal guides to help make sure the square is centered.


I always like to sew a zippered backing to my mini quilts so I have the option to use my project as a mini quilt OR pillow!


Are you ready to sew along with us???

Fat Quarter Shop has created a kit using Pat Sloan's Sunday Drive and the Morning Glory Pattern...it is so lovely!!! Just look at the loveliness below!


Supplies:


Be sure to check out the Fat Quarter's Shop's Blog: Jolly Jabber today for more information!

Thank you again to Fat Quarter Shop for providing me with the pattern and fabric so I could sew along!

Follow me on Instagram @mellierc for more of my sewing adventures.

Have a great start to your week! 

Melanie


Two last pictures....as a mini

...or pillow


SaveSave

Friday, March 3, 2017

Lemon Slice Table Runner and Hot Pad with Pucker Up Friday Bundle Batch at Fort Worth Fabric Studio


Happy Friday!!! Is it summer yet??? This week's Friday Bundle Batch - Pucker Up at Fort Worth Fabric Studio will make you think it is summer! I just love this bright and cheery bundle! 


When I saw all the lovely yellows- I knew I wanted to sew something bright for my home! I remembered the fabulous Orange Slice Mug Rug that Lindsey made last year, which has been on my "must make" list...so I made one.  It was so fun to sew that I needed a matching a table runner so I adapted her pattern into a table runner. Are you ready to sew a  Pucker Up Lemon Slice Mug Rug and Table Runner?

Supplies: (click on links)
Insul-Bright for Mug Rug (so it can be a hot pad too)
Batting from stash
Heat N Bond Lite from stash


For Mug Rug:
Follow Lindsey's fabulous tutorial to make your Lemon Slice Version. I even quilted mine like hers!


Lemon Slice Table Runner
I loved this Orange/Lemon Slice pattern so much that I knew I needed a table runner based on this pattern. Here is a little tutorial so you can make your own.

Cutting:
- Cut (16) 4.5" squares from the yellow fabrics
- Cut and fuse with Heat N Bond 16 Lemon Slices (from Lindsey's Orange Slice Tutorial)
- Cut (2) 10" x 16.5" rectangles from the Swiss Dots Yellow fabric


Piecing and Finishing
1. Sew (16) 4.5" yellow squares together into a 4 x 4 patchwork square (16.5" x 16.5")
2. Follow Lindsey's Orange Slice tutorial to attach 1 Lemon/Orange to each Swiss Dot fabric (center lemon)
3. Sew (1) Lemon Slice to each opposite side of yellow patchwork squares.


To make my table runner backing. I just cut strips of my left over fabrics until it was the desired size. I love being able to use the full fat quarter bundle.


Quilt as desired. I stippled the patchwork and used my free motion foot to draw around the slices and spiral in the center (I free hand....so it's not perfect...but I still like it). 


Now it's time to bind your table runner with the fabulous Small Talk Black Newsprint Studio E  fabric! Doesn't this Lemon Slice Table Runner and Mug Rug make you think it's summertime?!?!?


A bit about the fun extras I used this week...

I wanted to show a close up of the best ever text fabric with sewing words...oh my...it is adorable! I definitely need order more as I LOVE it! Small Talk Black Newsprint Studio E 


I ordered myself a pair of these Polka Dot Scissors and they were great for cutting out the lemon wedges from the fabric that I fused with Heat N Bond. I don't like to use my fabric scissors for this task as I don't want to dull them...so these super cute $2.95 scissors were perfect! See how cute!
Thank you again to Fort Worth Fabric Studio for having me create a project with this fabulous Pucker Up Fat Quarter Bundle!!! Be sure to grab your bundle here. Tag your projects on social media with #sewingwithfwfabricstudio and @fwfabricstudio and me @mellierc

Have a great day !

Melanie

Wednesday, March 1, 2017

Bella Skill Builder with Fat Quarter Shop - Month 2 - Orange Peel


It is March 1st and Month 2 of the Bella Skill Builder with Fat Quarter Shop. I loved making the Orange Peel blocks! I think they are my favorite! 

I used Heat N Bond Lite to adhere my orange peels and then stitched around the edge of each peel with Aurifil 50wt thread. Stitching isn't necessary with the Heat N Bond, but I like the decorative touch it adds. I also found using the Impression Orange Peel Quilting Templates to be super helpful in tracing accurate shapes. 

Just look at this lovely pile of orange peel blocks before I pieced them together.  I'm quite sure an Orange Peel quilt is in my future! Moda Bella fabrics used:  Caribbean 9900-86, Ruby Ice 9900-169, Boysenberry 9900-217.


Ready to make your Orange Peel Blocks.... Click on the links and video below
  • Kimberly and Sherri made this fabulous video below to help you make your own Orange Peel blocks.


I hope you are sewing along with us with the Bella Skill Builder- it is a fabulous way to learn new sewing skills. 

Follow me along on Instagram @mellierc  where I show more of my current sewing projects!

Have a great day!

Melanie